

Build an automation
An automation runs your outreach on its own: when a trigger fires, optyflo walks each contact through a sequence of steps — send an email, wait, branch on a condition, add a tag, and so on. Set it once, and it works around the clock. Think "Zapier, but built for email."
This guide uses Automation 3.0, optyflo's visual workflow builder — a drag-and-drop canvas with multi-branch conditions and live stats.
Before you start
- Connect your SMTP first, or your workflow's logic will run but the emails won't actually deliver.
- Every workflow needs a Trigger and at least one real step (e.g. a Send Email with a template or subject) before you can publish it.
Don't see "Automation 3.0"?
Automation 3.0 is a feature that's on by default. If it isn't in your sidebar under Automations, it isn't enabled for your account yet — ask your admin to turn it on.
Step 1 — Open Workflows
In the sidebar, go to Automations → Automation 3.0 (route /client/automations/workflows). This is the Workflows home, subtitled "Automation 3.0 visual workflow builder."
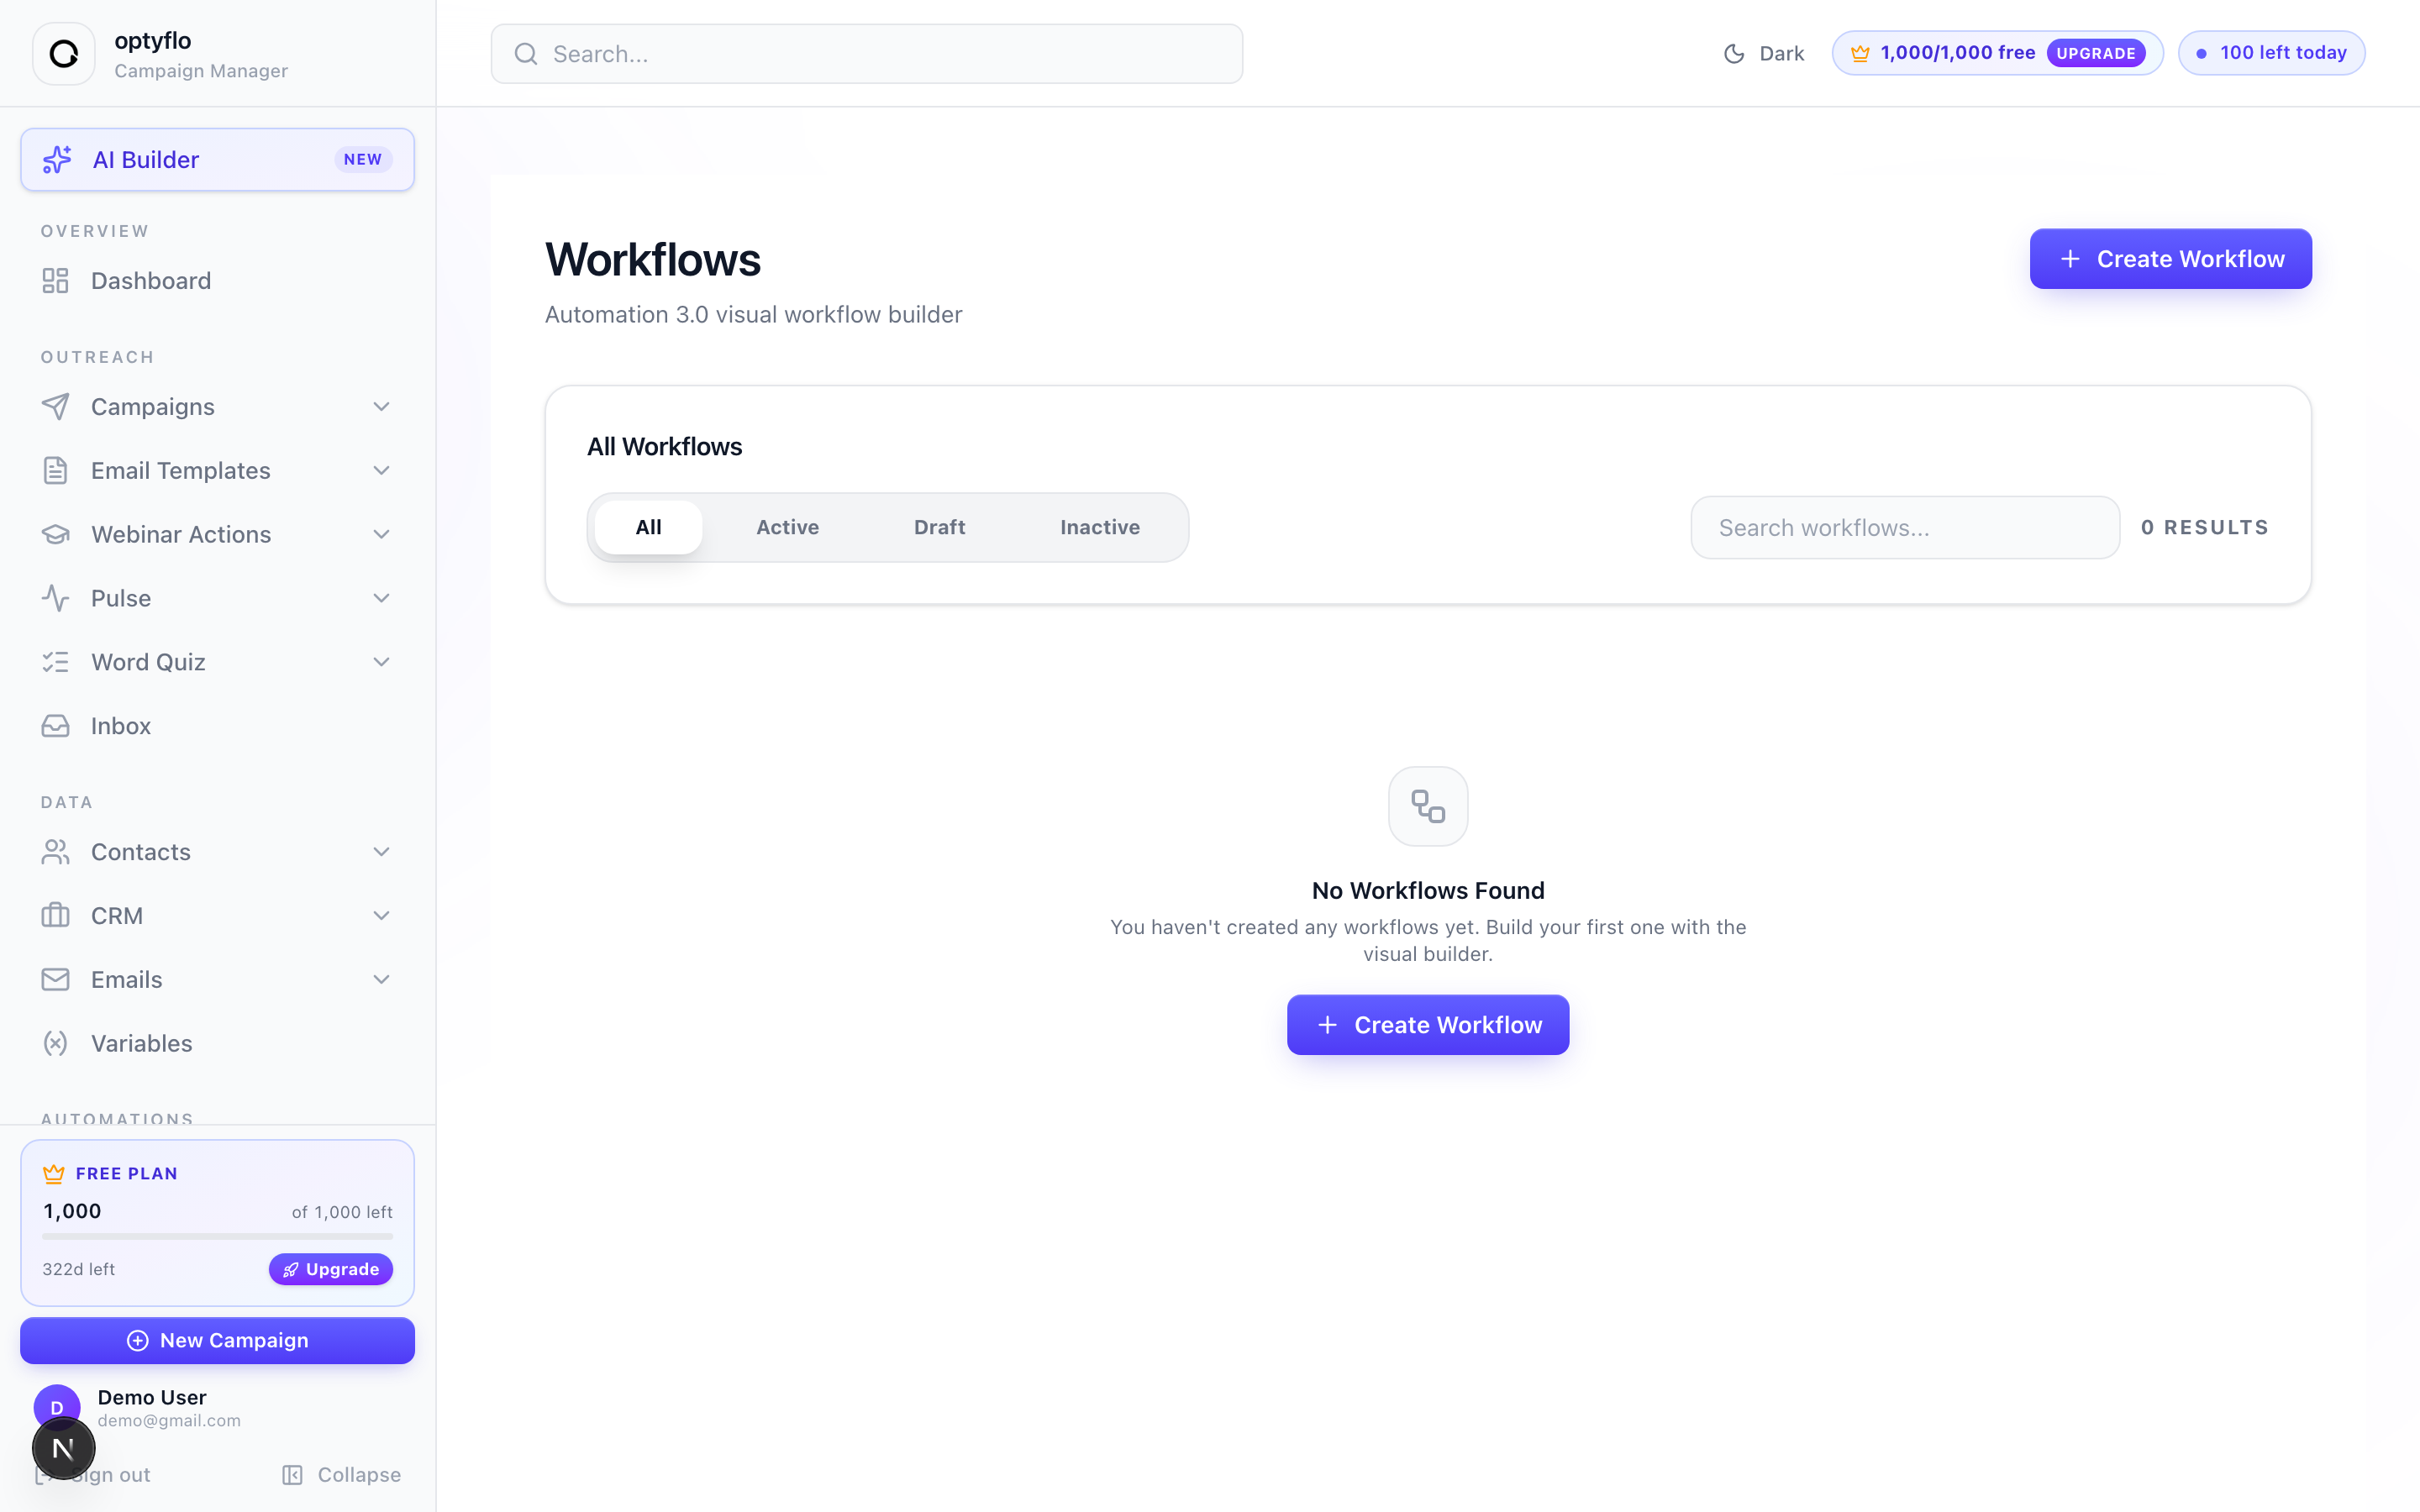 The Workflows list. Filter by All / Active / Draft / Inactive, search, or start a new one.
Click Create Workflow (top-right, or the button in the empty state) to open the builder. Existing workflows appear here as cards you can Edit, Activate/Deactivate, Duplicate, or Delete, each with an Active, Draft, or Inactive status badge.
Step 2 — Meet the builder
The builder is a canvas. New workflows are named "Untitled Workflow" (click the name to rename it). You build by dragging nodes from the "Nodes" panel on the left onto the canvas and connecting them.
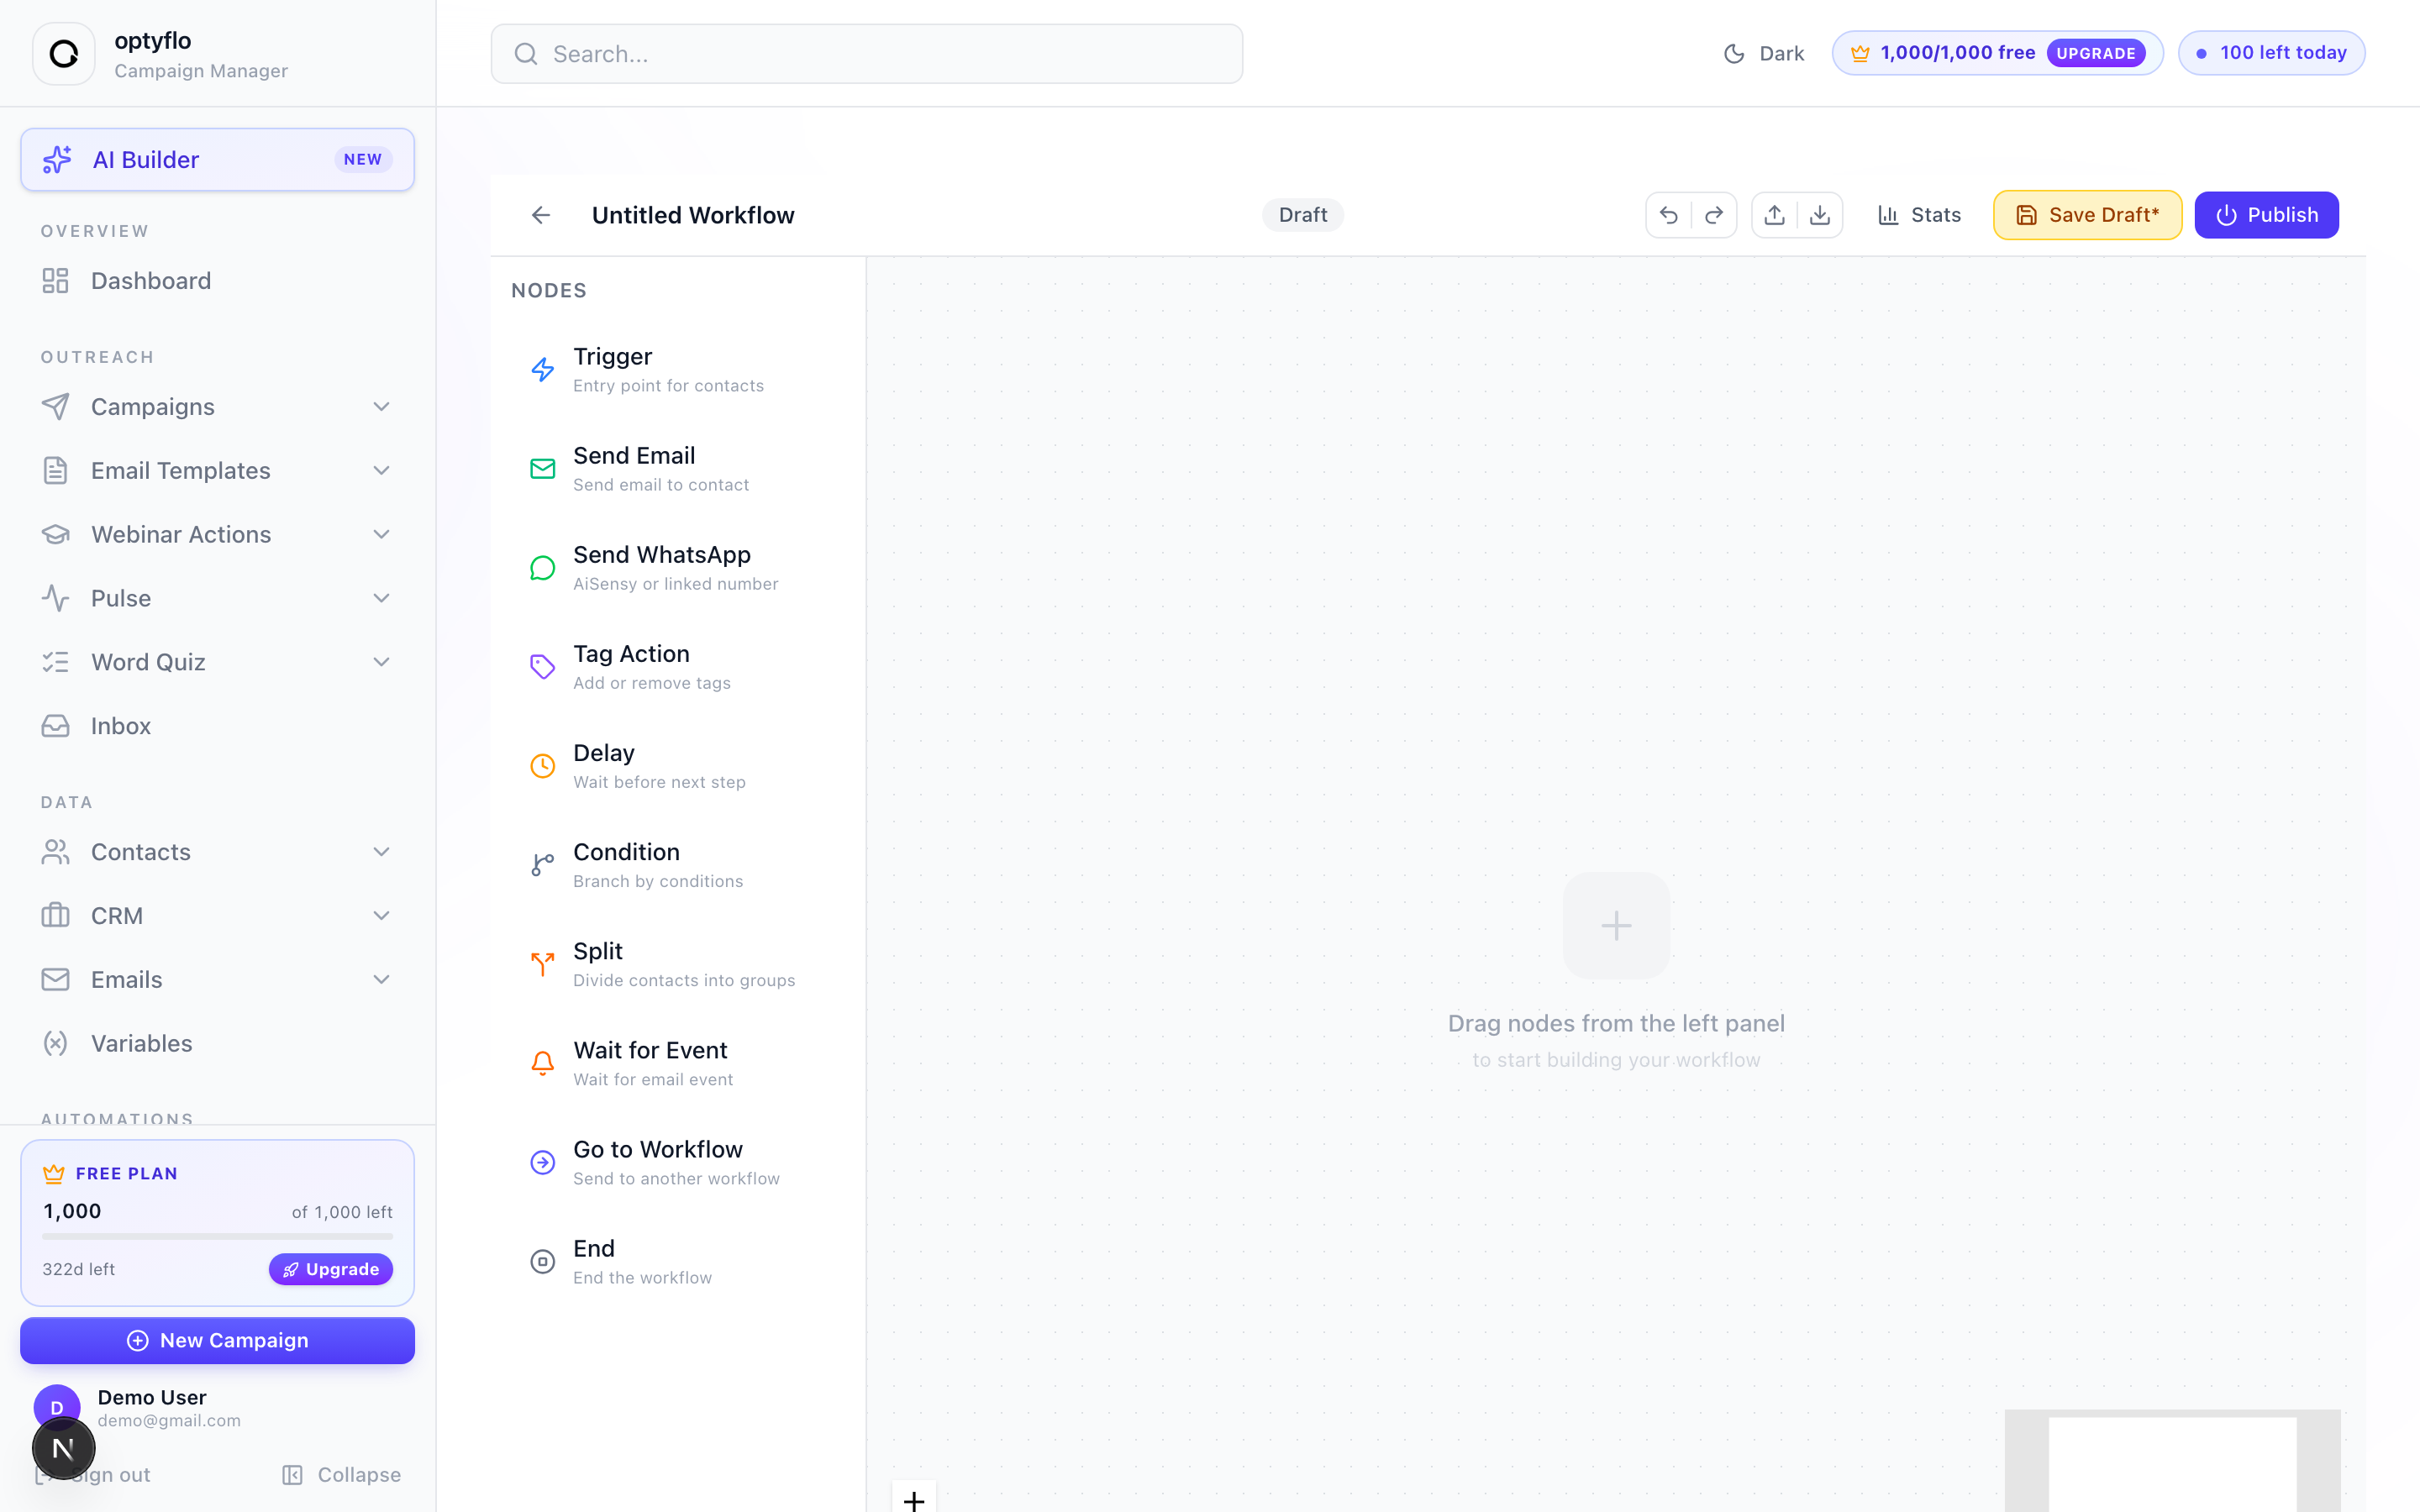 The workflow canvas. Drag nodes from the left "Nodes" panel to build your flow.
The toolbar across the top gives you Undo/Redo, Import/Export, History (version history), Enroll (add existing contacts that match your trigger), Stats (a live-stats overlay), Save Draft, and Publish. Your changes auto-save every few seconds, so you rarely lose work.
Step 3 — Choose your trigger
Every workflow starts with a Trigger — the event that enrolls a contact. Drag the Trigger node onto the canvas, then click it to open Trigger Settings on the right and pick a Trigger Type.
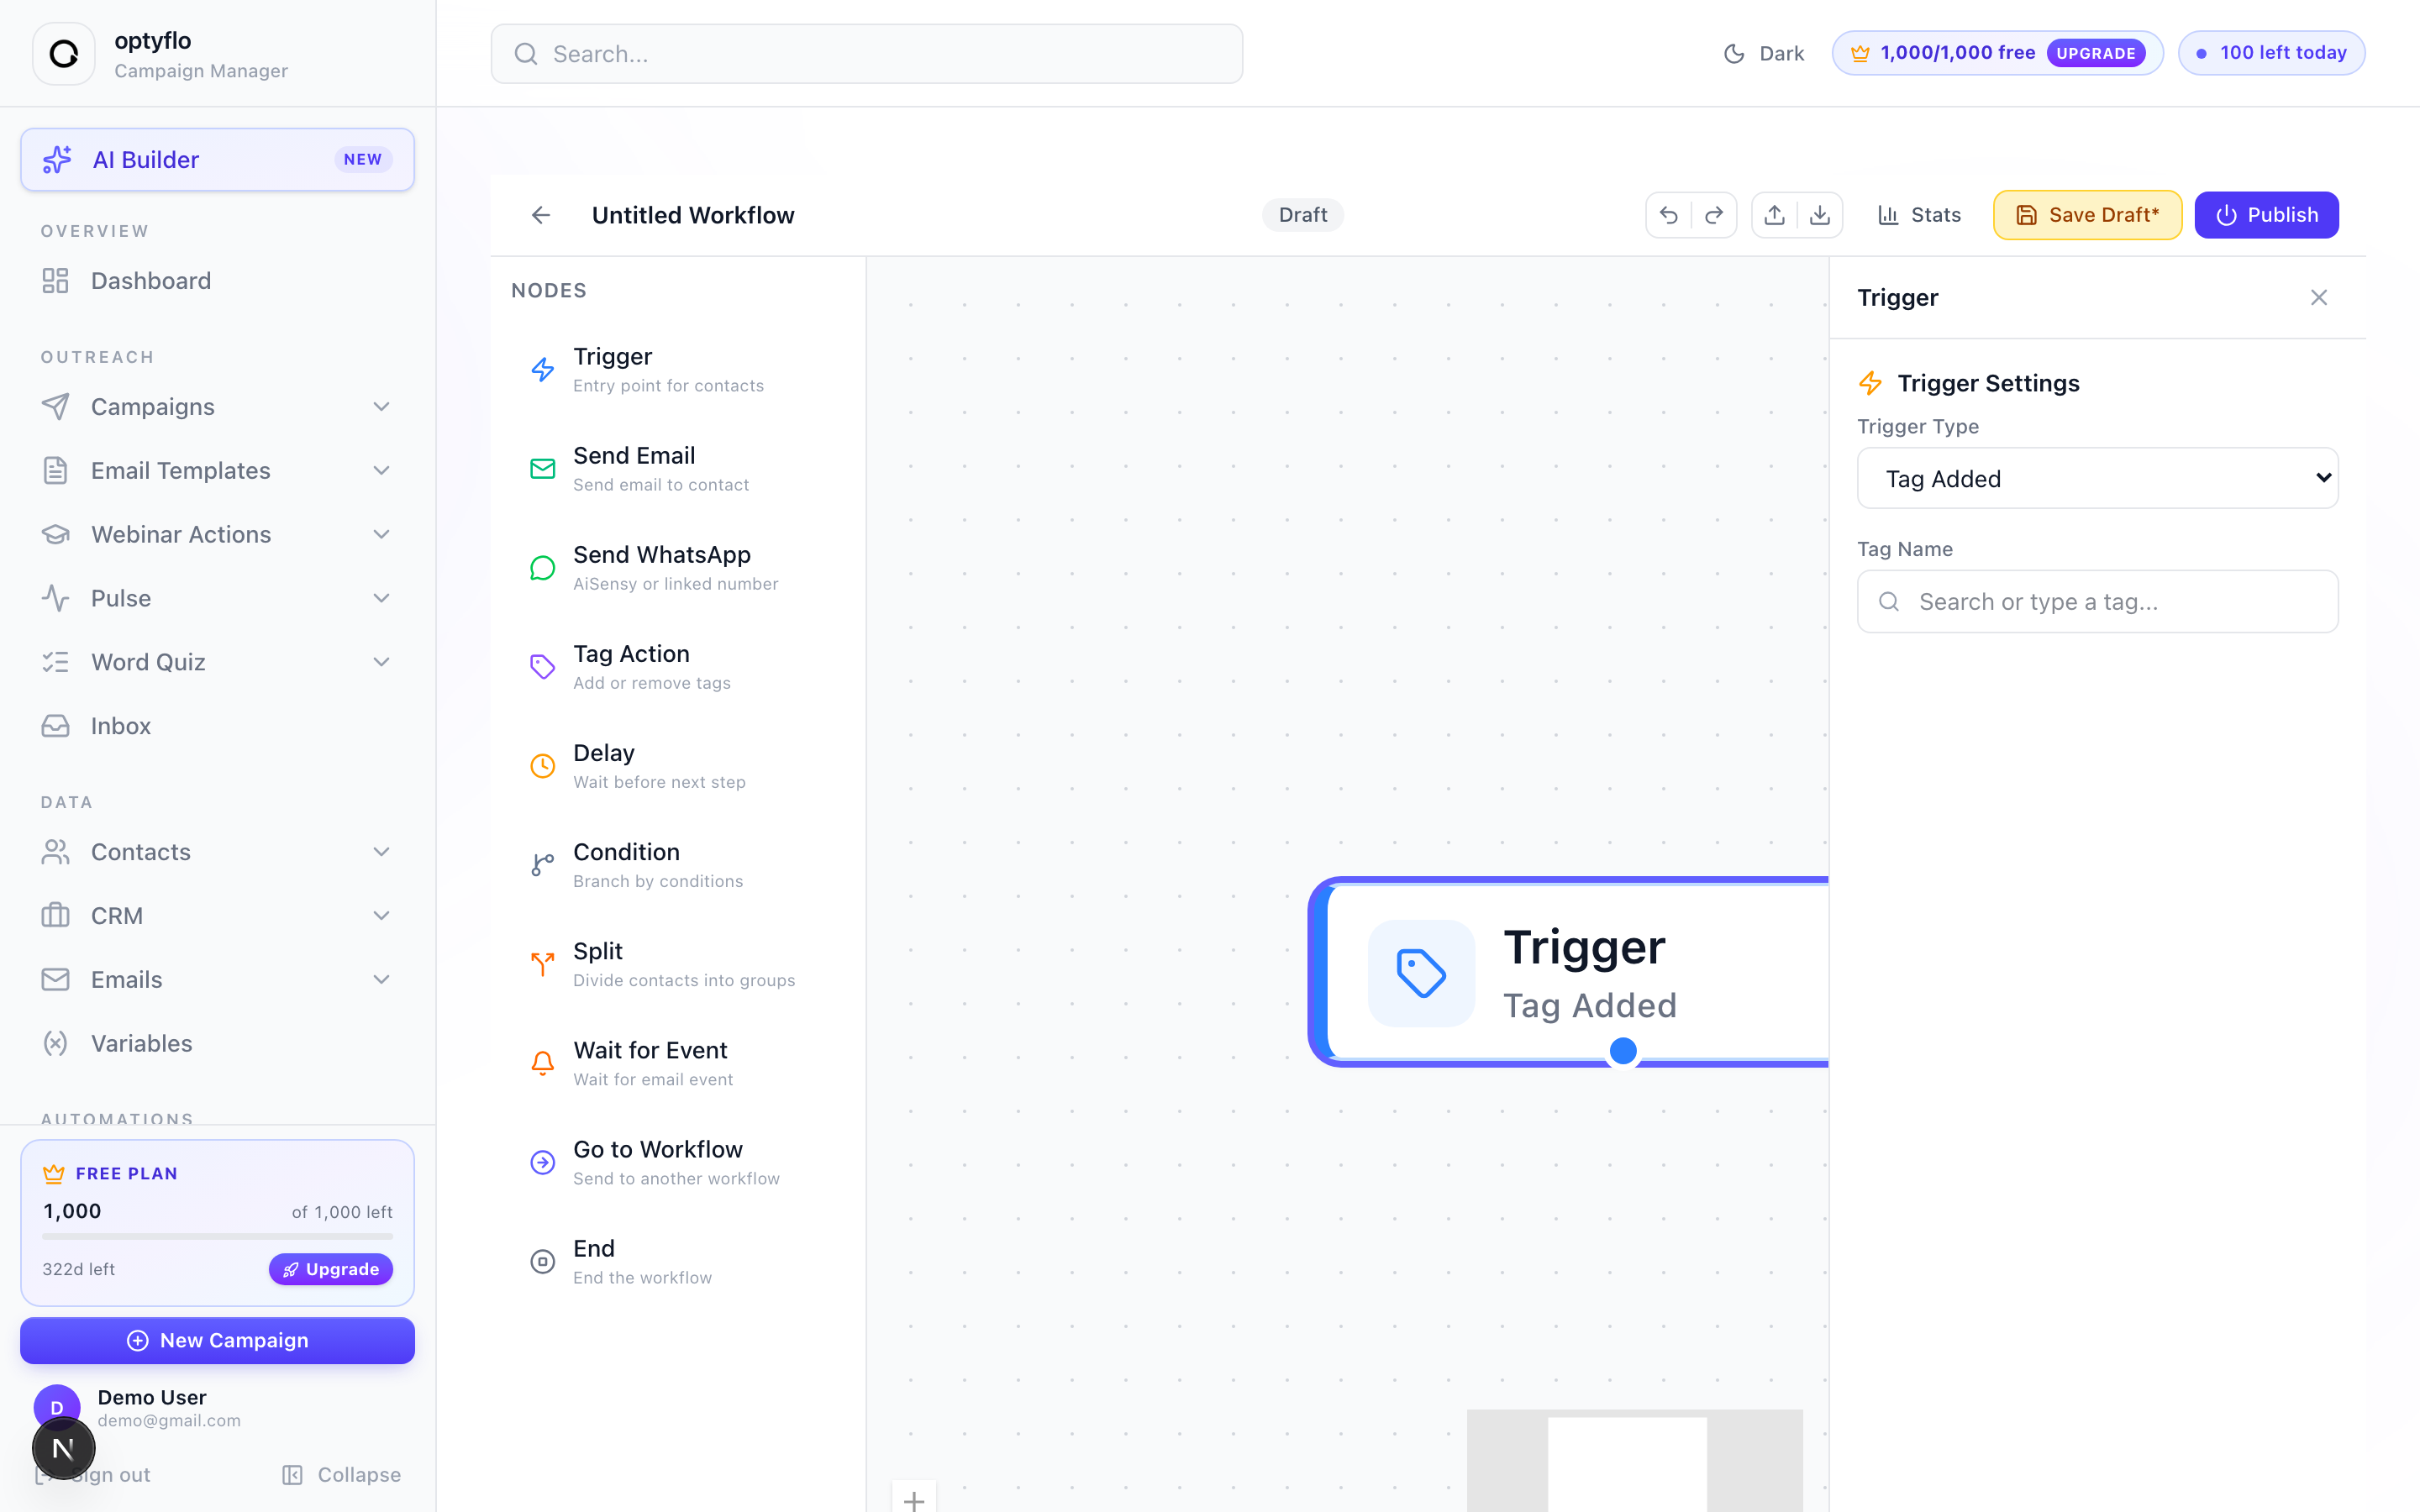 Drop a Trigger node, then choose its type and target in the Trigger Settings panel.
All trigger types
Automation 3.0 offers six trigger types. Here's exactly when each one fires and what it needs:
| Trigger | Fires when… | What you configure |
|---|---|---|
| Tag Added | a tag is added to a contact | a Tag Name (search an existing tag or type a new one) |
| Tag Removed | a tag is removed from a contact | a Tag Name |
| Contact Created | a brand-new contact is created — from any source (manual add, CSV import, webhook, or a form) | (optional) + Add filter to only enroll contacts matching conditions you set; leave it off and every new contact enters |
| Form Submitted | a contact submits a specific form | Select Form (pick from your forms; create a form first if the list is empty) |
| CSV Imported | contacts are added through a CSV import | nothing extra |
| Manual Entry | a contact is added by hand, or enrolled via the builder's Enroll action | nothing extra |
Tags are the most flexible trigger
Tag Added pairs perfectly with the rest of optyflo: a webhook import, a form, or a rule can apply a tag, and that tag drops the contact straight into a workflow. One tag = one entry point you can reuse everywhere.
Step 4 — Add your steps
With the trigger in place, drag in the steps that make up the flow. Connect each node to the next by dragging from a node's handle to the following node.
| Node | What it does |
|---|---|
| Send Email | send a template (or an inline subject + body) to the contact |
| Send WhatsApp | send a WhatsApp message via AiSensy or a linked number |
| Tag Action | add or remove a tag on the contact |
| Delay | wait a set number of days, hours, or minutes before the next step |
| Condition | branch the flow into paths based on conditions (multi-branch) |
| Split | randomly divide contacts into weighted groups — great for A/B tests |
| Wait for Event | pause until an email event happens (e.g. the contact opens or clicks) |
| Go to Workflow | hand the contact off to another workflow |
| End | stop the workflow for that contact |
A simple welcome flow, for example: Trigger (Tag Added) → Send Email → Delay 2 days → Send Email → End.
Step 5 — Configure a Send Email step
Click a Send Email node to open its Email Settings. Choose an Email Template (search your library) and, optionally, override the Subject Line just for this step. Because a workflow can't publish with an empty email, pick a template or the node will show "No template selected."
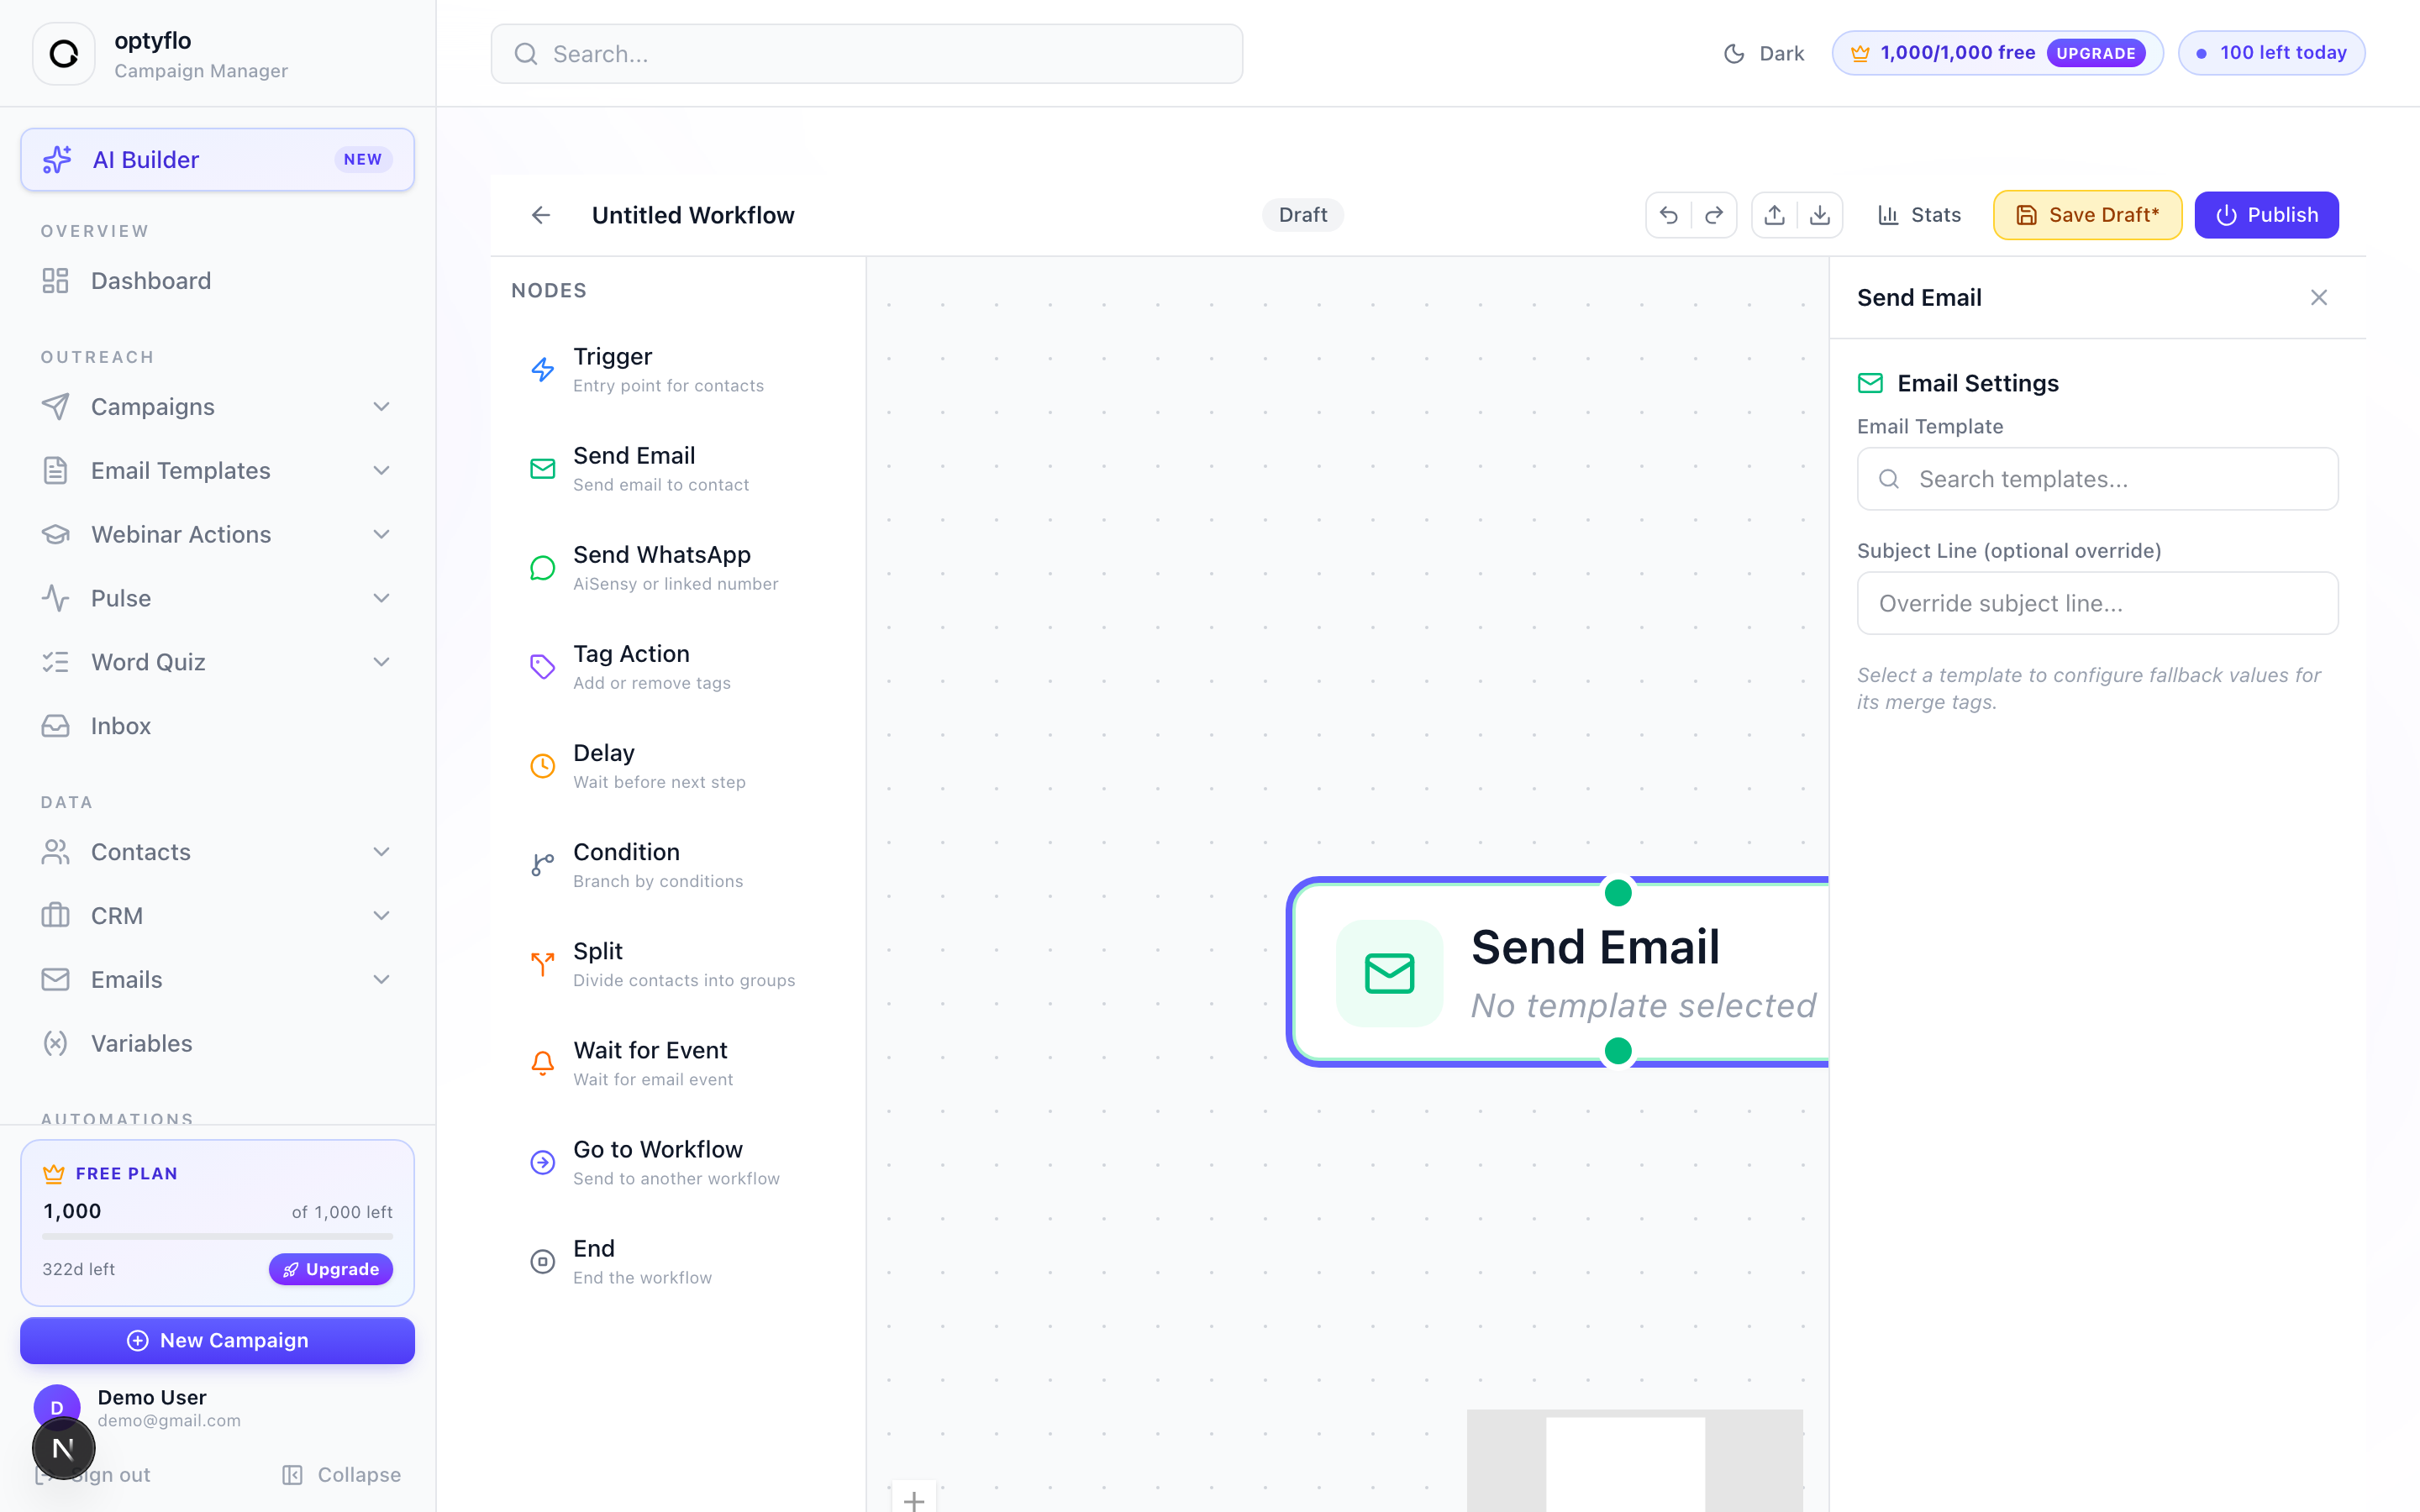 Configure a Send Email step: choose a template and optionally override the subject.
Personalization carries over
Templates keep their merge tags (, , and so on) inside a workflow — selecting a template lets you set fallback values for those tags. See Email templates.
Step 6 — Save & publish
Your work auto-saves as a draft (the button reads Save Draft / Save, and shows an asterisk when there are unsaved edits — Cmd/Ctrl + S saves immediately). When you're ready to go live, click Publish.
optyflo validates the workflow first (for example, "Workflow must have at least one Trigger node"), then shows a "Publish workflow" confirmation: "This will activate the workflow and start processing contacts matching its triggers in real time." Confirm with Publish, and the workflow flips to Active — new contacts that match the trigger start flowing through immediately.
To pause a live workflow, open it and click Deactivate (or toggle it from its card on the Workflows list). Every publish and save also snapshots a version you can restore from History.
Publishing checklist
- At least one Trigger and one real step (an email with a template/subject).
- SMTP connected so emails actually send.
- Want to backfill your existing audience, not just future contacts? Use Enroll in the toolbar to add contacts that already match the trigger.
Build it with AI
Prefer to describe it instead of dragging nodes? The sidebar AI Builder is a chat assistant that designs and edits Automation 3.0 workflows for you. Describe what you want — "Build a welcome sequence for newly tagged contacts" — and it drafts the flow on your canvas, reading your real templates, tags, and contacts.
It stages its changes as a preview you can review and test before anything goes live: a floating "AI Builder — Test Mode" toolbar lets you Review the proposed nodes, Send feedback, Discard, or Promote to Live — and nothing affects real contacts until you confirm Promote.
That's the whole journey — you can now import an audience, write emails with AI, send campaigns, and automate the lot with Automation 3.0. If you want to retrace any earlier step, head back to the overview. Happy sending. 🎉