

Connect your SMTP
optyflo sends email through your own email provider (SMTP), so your campaigns go out from your inbox and land with your sender reputation. Connecting SMTP is the first thing to do after signing in, and it unlocks everything else.
Required before you can send
Until you connect SMTP, campaigns, automations, and one-off sends will not deliver. This is step 1 of the setup checklist for a reason — do it before adding contacts or building anything else.
You can use Gmail, Amazon SES, your web host's mailbox, or any other SMTP provider.
Step 1 — Open the SMTP settings
Go to Settings → SMTP Configuration. You can also click Connect SMTP on the dashboard checklist. Either way you land on the SMTP Configuration page at /client/settings/smtp, described as "Connect your email provider so campaigns, automations, and one-off sends go out from your own inbox." A status badge at the top reads either ● Connected or ○ Not configured.
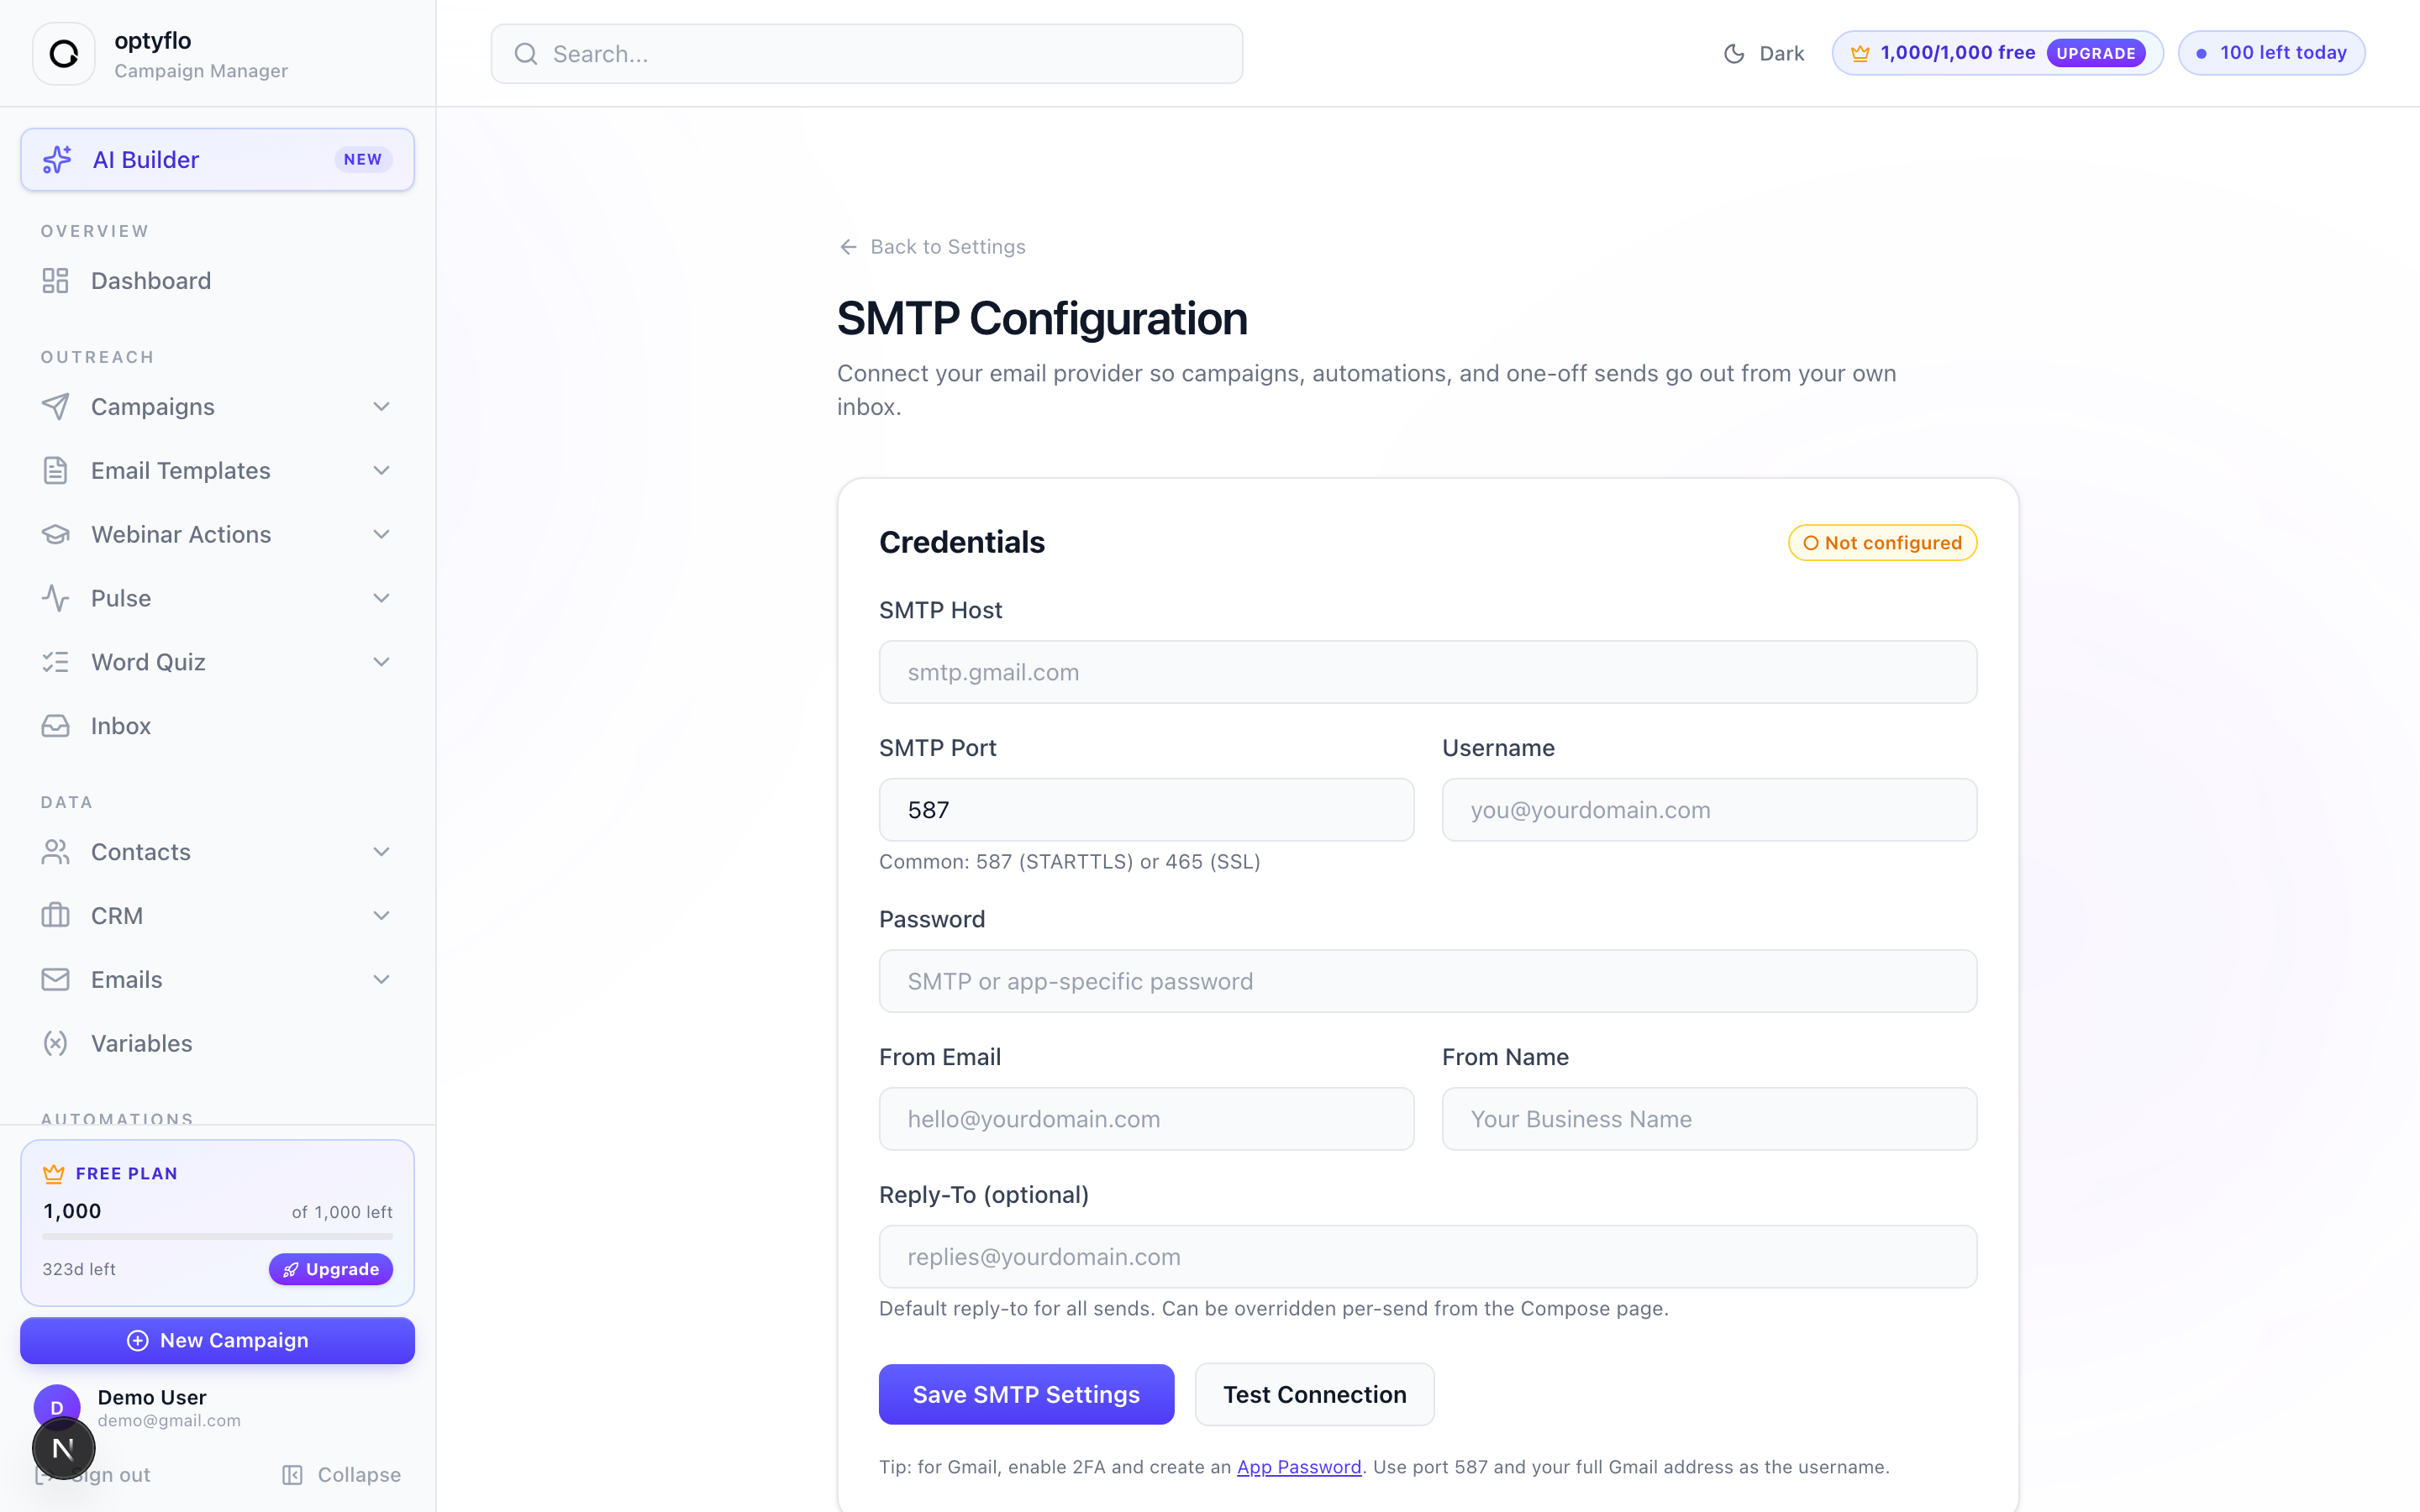 The SMTP Configuration page: enter your provider's credentials, then test and save.
Step 2 — Fill in your credentials
Enter the details from your email provider. These come from your provider's SMTP or sending settings — not your webmail login page. Fill every required field:
| Field | What to enter | Example |
|---|---|---|
| SMTP Host | Your provider's outgoing mail server | smtp.gmail.com |
| SMTP Port | Common: 587 (STARTTLS) or 465 (SSL) | 587 |
| Username | The login for your mailbox | you@yourdomain.com |
| Password | Your SMTP or app-specific password | (write-only — see below) |
| From Email | The address recipients see | hello@yourdomain.com |
| From Name | The name recipients see | Your Business Name |
| Reply-To (optional) | Default reply-to for all sends | replies@yourdomain.com |
The password field is write-only
For security, optyflo never displays a stored password. Once one is saved, the field's label becomes (stored — leave blank to keep current) — so you can edit any other field and save without re-typing the password.
Using Gmail
There are no provider presets, so enter the values yourself. For Gmail, enable 2-factor authentication and create an App Password. Then use smtp.gmail.com, port 587, and your full Gmail address as the Username.
Step 3 — Test the connection
Click "Test Connection" to confirm the credentials work. The button shows Testing… while it runs, then reports the result inline with a ✓ (success) or ✗ (error). Fixing problems here — a wrong host, port, or password — is much easier than discovering them after a campaign fails to send.
Step 4 — Save your settings
Click "Save SMTP Settings" to store the configuration. The button shows Saving…, then a "SMTP settings saved" message confirms it and the status badge flips to ● Connected. From now on, every campaign, automation, and one-off send goes out from this identity.
Changing or disconnecting later
Come back to this page any time to update your provider. Because the password is write-only, leave it blank to keep the current one while editing other fields. When you're connected, a Disconnect SMTP button appears — clicking it clears your stored credentials and pauses all sending until you reconfigure.
Reply-To can be overridden per send
The Reply-To (optional) you set here is the default for all sends. You can override it on individual sends from the Compose page.
Next: bring in your audience → add a contact manually, import a CSV, or import via webhook.