

Import contacts via webhook
A webhook lets any external system add contacts to optyflo automatically — no manual export or import. Point Zapier, Make, Pabbly, a signup form, or your own script at your personal webhook URL, and new contacts flow in the moment they're captured.
Before you start
Your webhook URL contains a secret key and works like a password — anyone who has the full URL can add contacts to your account. Only paste it into tools you trust, and regenerate it if it ever leaks.
Step 1 — Generate your webhook URL
Go to /client/contacts/webhook-import. The page is titled "Webhook Contact Import" with the description "Import contacts from any external system (Zapier, Make, Pabbly, custom scripts) via webhook." The first time, no URL exists yet — you'll see "No webhook URL configured yet." Click Generate Webhook URL.
Once active, the full URL appears in a mono box with a Copy button (it reads "Copied!" on click), an Active pill, and controls to Regenerate URL or Disable Webhook — both of which invalidate the old URL.
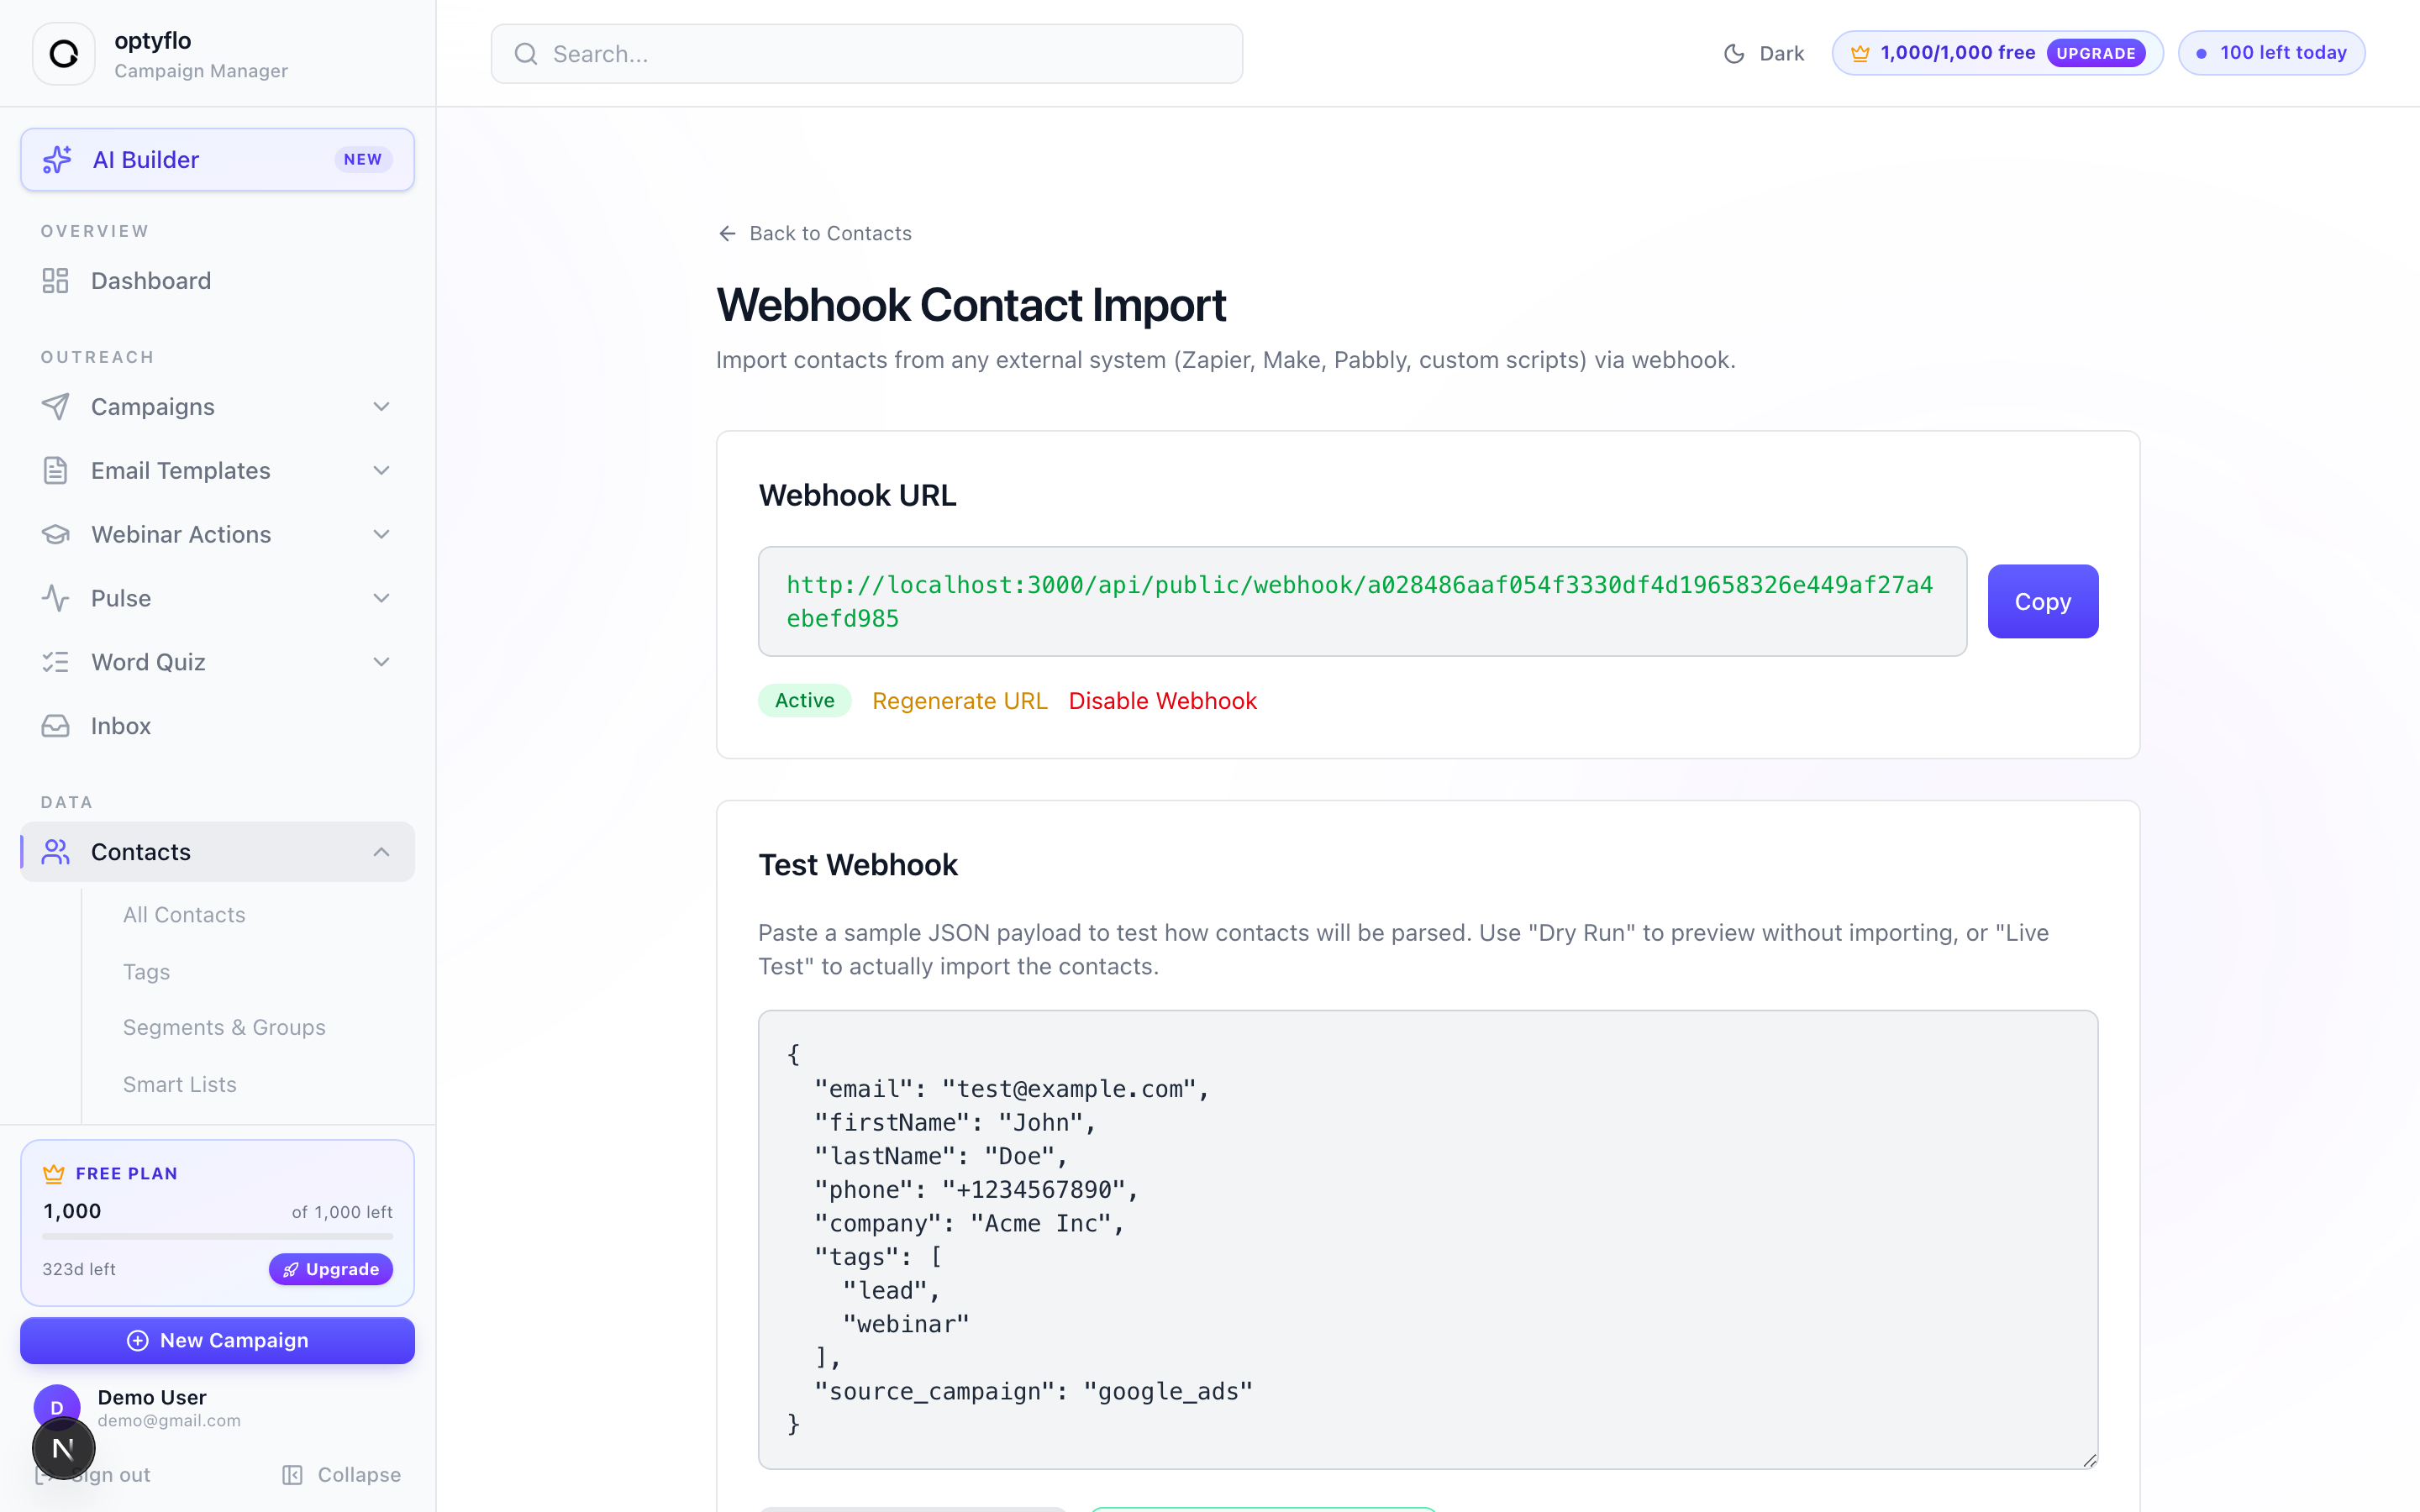 Once generated, your unique webhook URL appears with a Copy button, an Active status, and a test panel below.
The URL looks like this, with a long hex secret embedded directly in the path:
https://optyflo.com/api/public/webhook/<secret>The secret lives in the URL
There is no separate "secret" field to copy — the long key is part of the URL itself. Treat the whole URL as a password. (The screenshot above shows a localhost URL because it was captured on a local machine; in production your URL uses the optyflo.com domain.)
Step 2 — Send contacts to the URL
Have your external tool POST JSON to the URL. Three body shapes are accepted, so most tools work without reshaping their output:
// A single contact
{ "email": "john@acme.com", "firstName": "John", "tags": ["lead"] }

// Multiple contacts
[ { "email": "a@b.com" }, { "email": "c@d.com" } ]

// Wrapped in a "contacts" key
{ "contacts": [ { "email": "..." } ] }
optyflo maps common field names for you. Only email is required; everything else is optional:
| Field | Also accepts | Required |
|---|---|---|
email | Email, EMAIL | Yes |
firstName | first_name, FirstName, name | No |
lastName | last_name, LastName | No |
phone | Phone, phoneNumber, phone_number | No |
company | Company, organization | No |
tags | array or comma-separated string | No |
| (any other field) | — | Becomes a custom field |
Integration guide built in
The page includes a cURL example pre-filled with your real URL, plus the full field-mapping reference — handy when wiring up Zapier, Make, or a custom script.
Step 3 — Test before going live
Use the Test Webhook panel to dry-run your payload. Paste sample JSON into the textarea, then choose:
- Dry Run (Preview Only) — shows exactly what would happen, with Will Create / Will Update badges per contact. Nothing is saved.
- Live Test (Actually Import) — sends the payload through for real, returning
Created: X | Updated: Y | Skipped: Z.
Step 4 — Understand what happens on arrival
Know how each incoming contact is handled so your automations fire the way you expect:
- A new email creates a contact and fires any
contact_addedautomations. - An existing email updates that contact, and any newly added tags fire
tag_addedautomations. - Invalid emails are skipped and reported in the response.
That means a webhook import can automatically kick off a welcome sequence the instant a lead is captured elsewhere.
Next: write your first email → Write an email with AI