

Welcome to optyflo
optyflo is an all-in-one platform for turning contacts into customers. Email campaigns, AI email writing, contacts and CRM, a unified inbox, WhatsApp, webinars, and visual automations all live in one place, sharing one contact list and one bill. Instead of stitching together five separate tools, you run your entire outreach from a single dashboard.
This page orients you: what optyflo does, and the order to set it up so you reach your first send with the least friction.
Start on the free plan
Every account includes 1,000 lifetime emails on the free plan, so you can set everything up and send real outreach before paying anything.
What optyflo does
Everything below draws from the same contact list, so a person you add once is available to every feature:
| Area | What it's for |
|---|---|
| Email campaigns | Send one-off or scheduled broadcasts to a segment of your contacts. |
| AI email writing | Draft subject lines and body copy from a short prompt. |
| Contacts / CRM | Store, tag, and organize the people you're reaching. |
| Unified inbox | Read and reply to responses without leaving optyflo. |
| Reach contacts on WhatsApp alongside email. | |
| Webinars | Run webinar-driven outreach and follow-ups. |
| Visual automations | Build sequences that trigger and send on their own. |
The recommended setup order
Do these in sequence. Each step builds on the one before it, and the first two are required before optyflo can send anything.
Step 1 — Log in and learn the dashboard
Sign in and get your bearings. The dashboard is your home base: the left sidebar navigates every feature, and a setup checklist guides you to your first send. Spend a minute here before diving in.
See Logging in & the dashboard.
Step 2 — Connect your SMTP
Plug in your email provider — this is required to send. optyflo delivers through your own SMTP provider (Gmail, Amazon SES, your web host, and so on). Until it's connected, campaigns and automations will not go out.
See Connect your SMTP.
Step 3 — Add your contacts
Bring in the people you want to reach. Campaigns need recipients. You can add contacts manually, import a CSV file, or feed them in automatically via webhook.
Step 4 — Write an email
Create the message you'll send. Use the AI builder to generate copy from a prompt, or build a reusable email template in the visual builder.
Step 5 — Create and schedule a campaign
Send your first broadcast. Pick a template, choose recipients, and send now or schedule for later. See Campaigns.
Step 6 — Build an automation
Let outreach run on its own. Trigger sequences on events like sign-ups or replies, set it once, and let optyflo do the sending. See Automations.
The 5-step setup checklist
When you first land on the dashboard, you'll see a "Welcome to optyflo — let's get you set up" checklist. It's the fastest path to your first send, and each step links straight to where the work happens:
| Step | What it does | Where it takes you |
|---|---|---|
| Connect your SMTP | Plug in any SMTP provider so optyflo can send on your behalf. | Settings → SMTP |
| Add your first contact | Import a CSV or add a contact manually — campaigns need recipients. | Contacts → Import |
| Create an email template | Use the visual builder, AI generator, or pick a starter. | Email Templates |
| Send your first campaign | Pick a template, choose recipients, and ship outreach. | New Campaign |
| Set up an automation | Trigger sequences on events — set it once, send forever. | Automations |
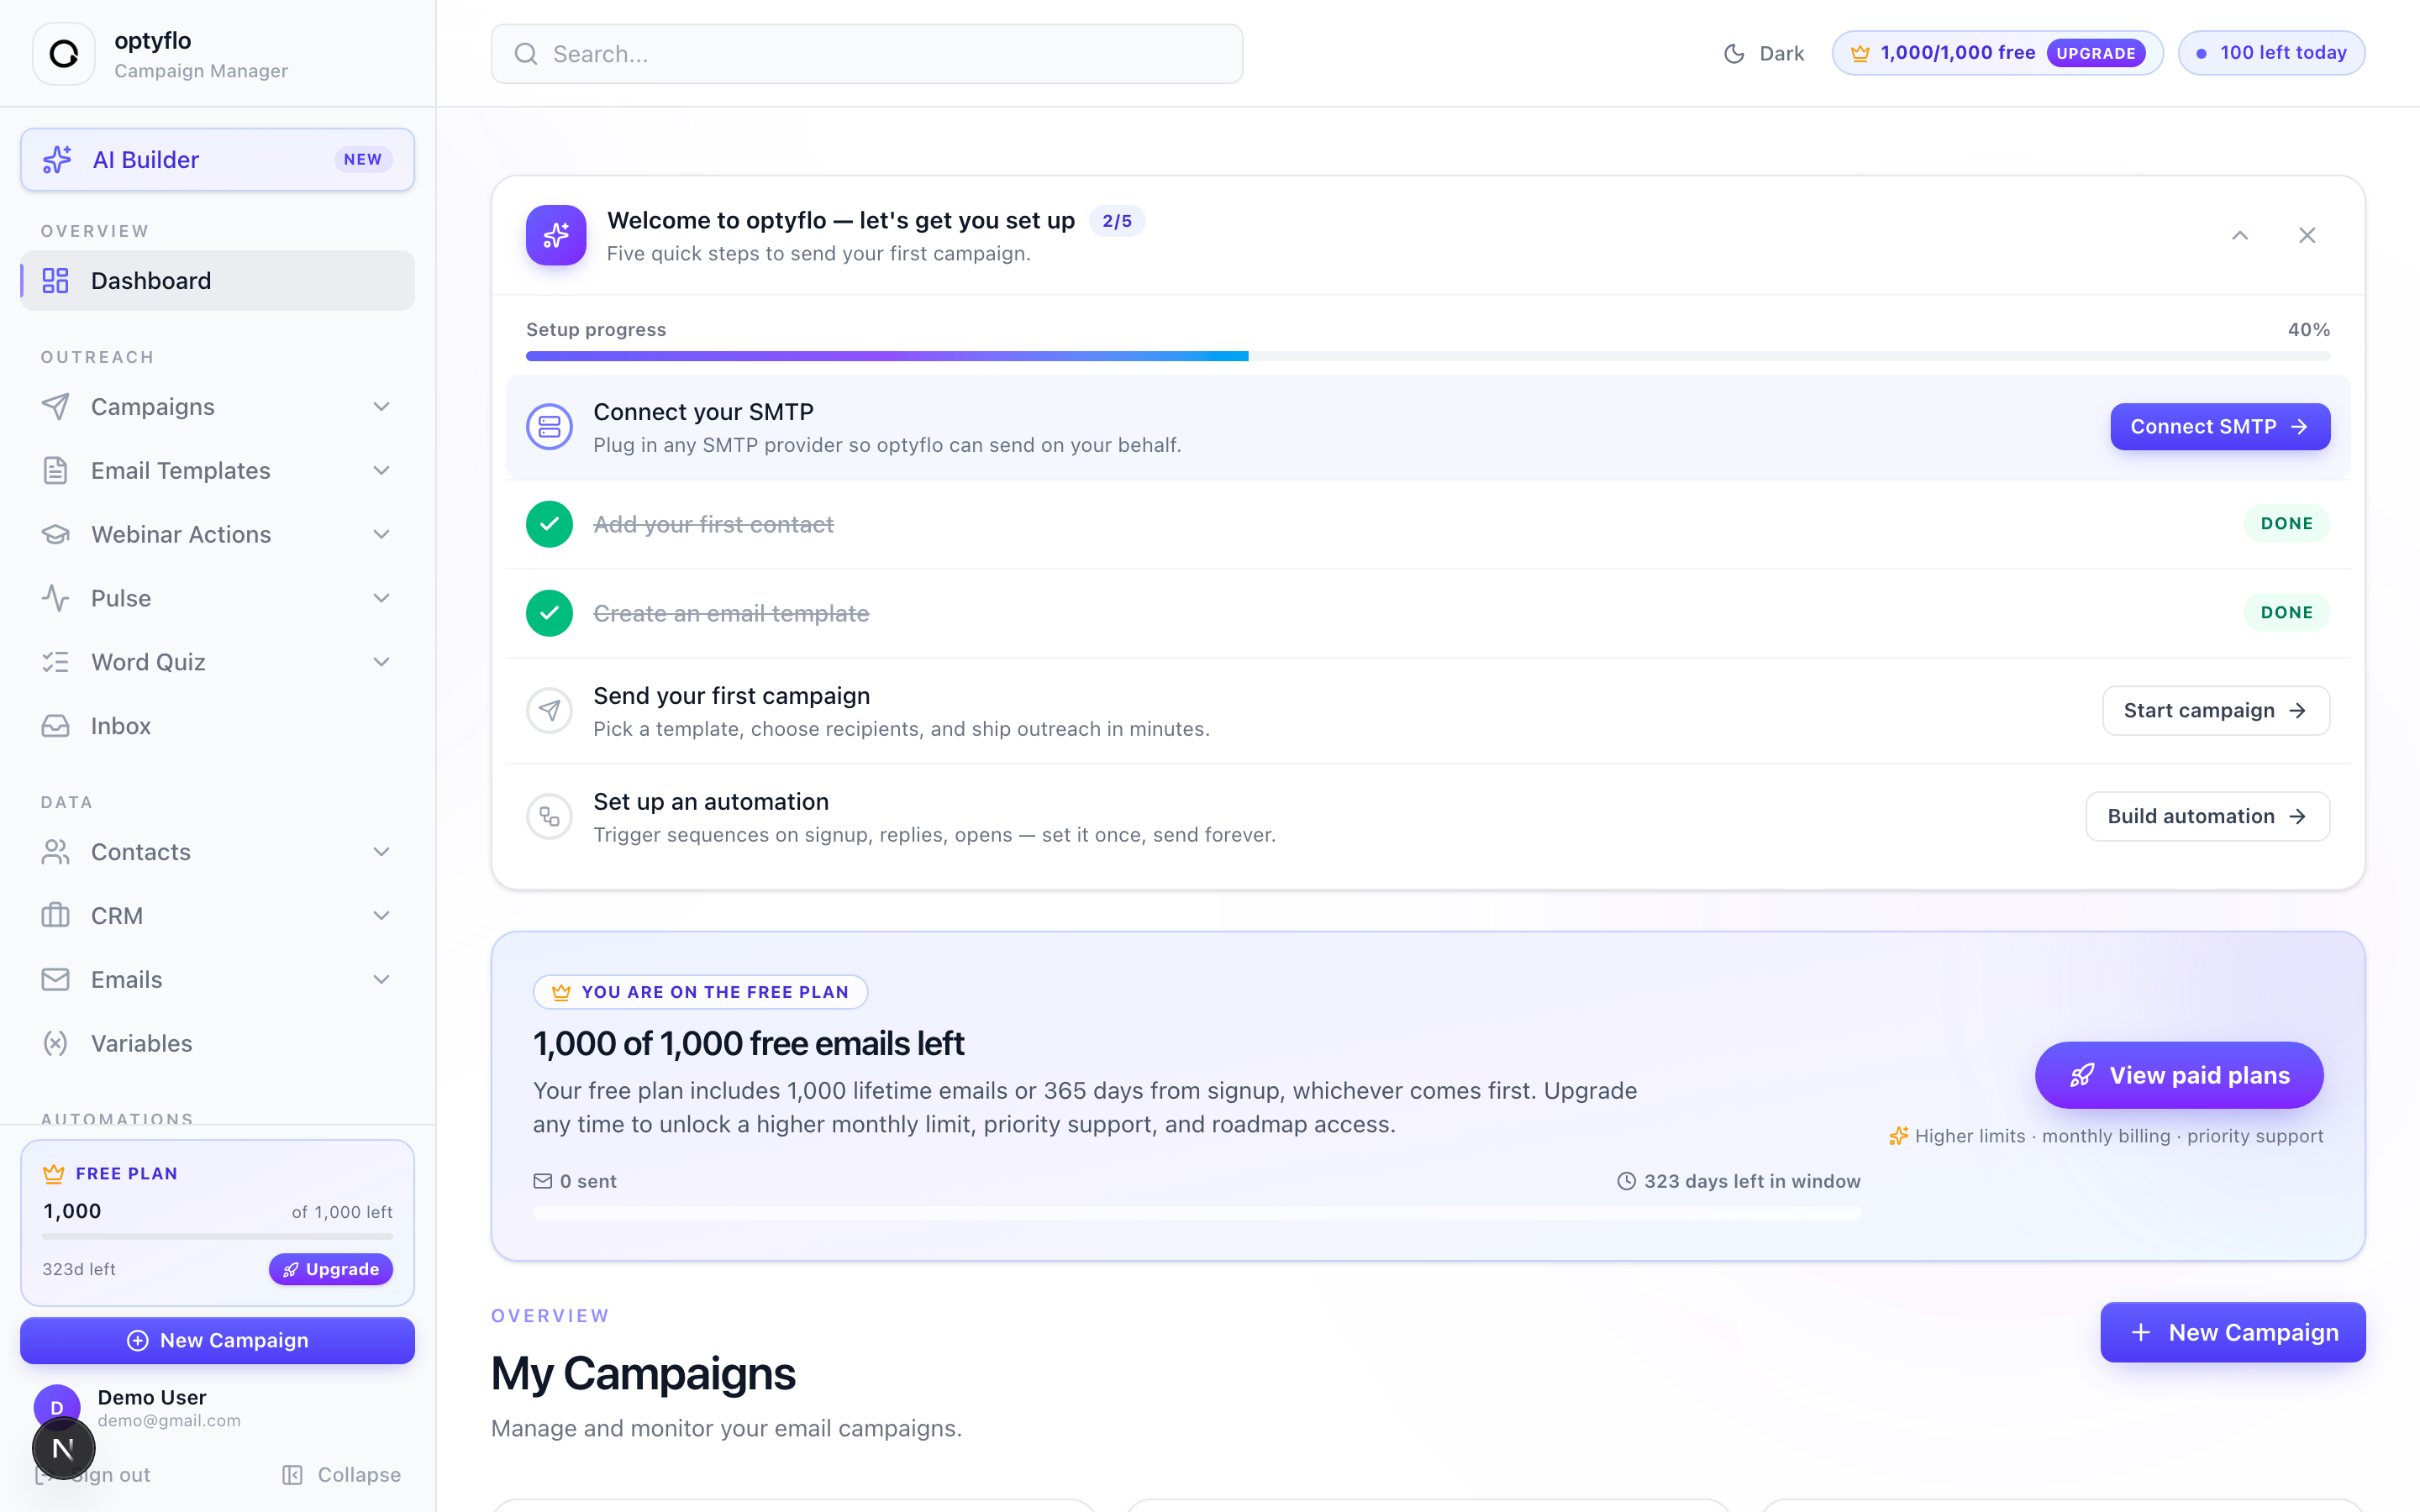 The post-login dashboard, with the setup checklist at the top and your plan usage and campaigns below.
Do the SMTP step first
Connecting your SMTP is the prerequisite for everything that sends. Campaigns and automations won't deliver until it's connected. A green Done badge appears as you finish each step, and the checklist hides itself once all five are complete.