

Add a contact manually
Adding one person by hand is the quickest way to get started or to capture a single new lead — a referral, a business card, someone who just replied to you. This guide walks you through creating a contact from scratch and explains why a few optional fields are worth filling in.
Recommended
You only need a name and an email to save a contact. Everything else is optional — but adding tags now makes it far easier to target campaigns and trigger automations later.
Step 1 — Open the Contacts page
Go to /client/contacts from the sidebar. This is the home for everyone in your audience, and where every new contact will land.
At the top you'll see stat cards for Total Contacts, Groups, CSV Imports (7d), and Webhook Imports, followed by a Search contacts... box and your contact table. Use the Active and Deleted tabs to switch views (deleted contacts can be restored), or open Advanced Filters to narrow by tag, company, city, state, country, or Import Source. If this is a fresh account you'll see the empty state "No contacts yet" with the prompt "Add your first contact to get started".
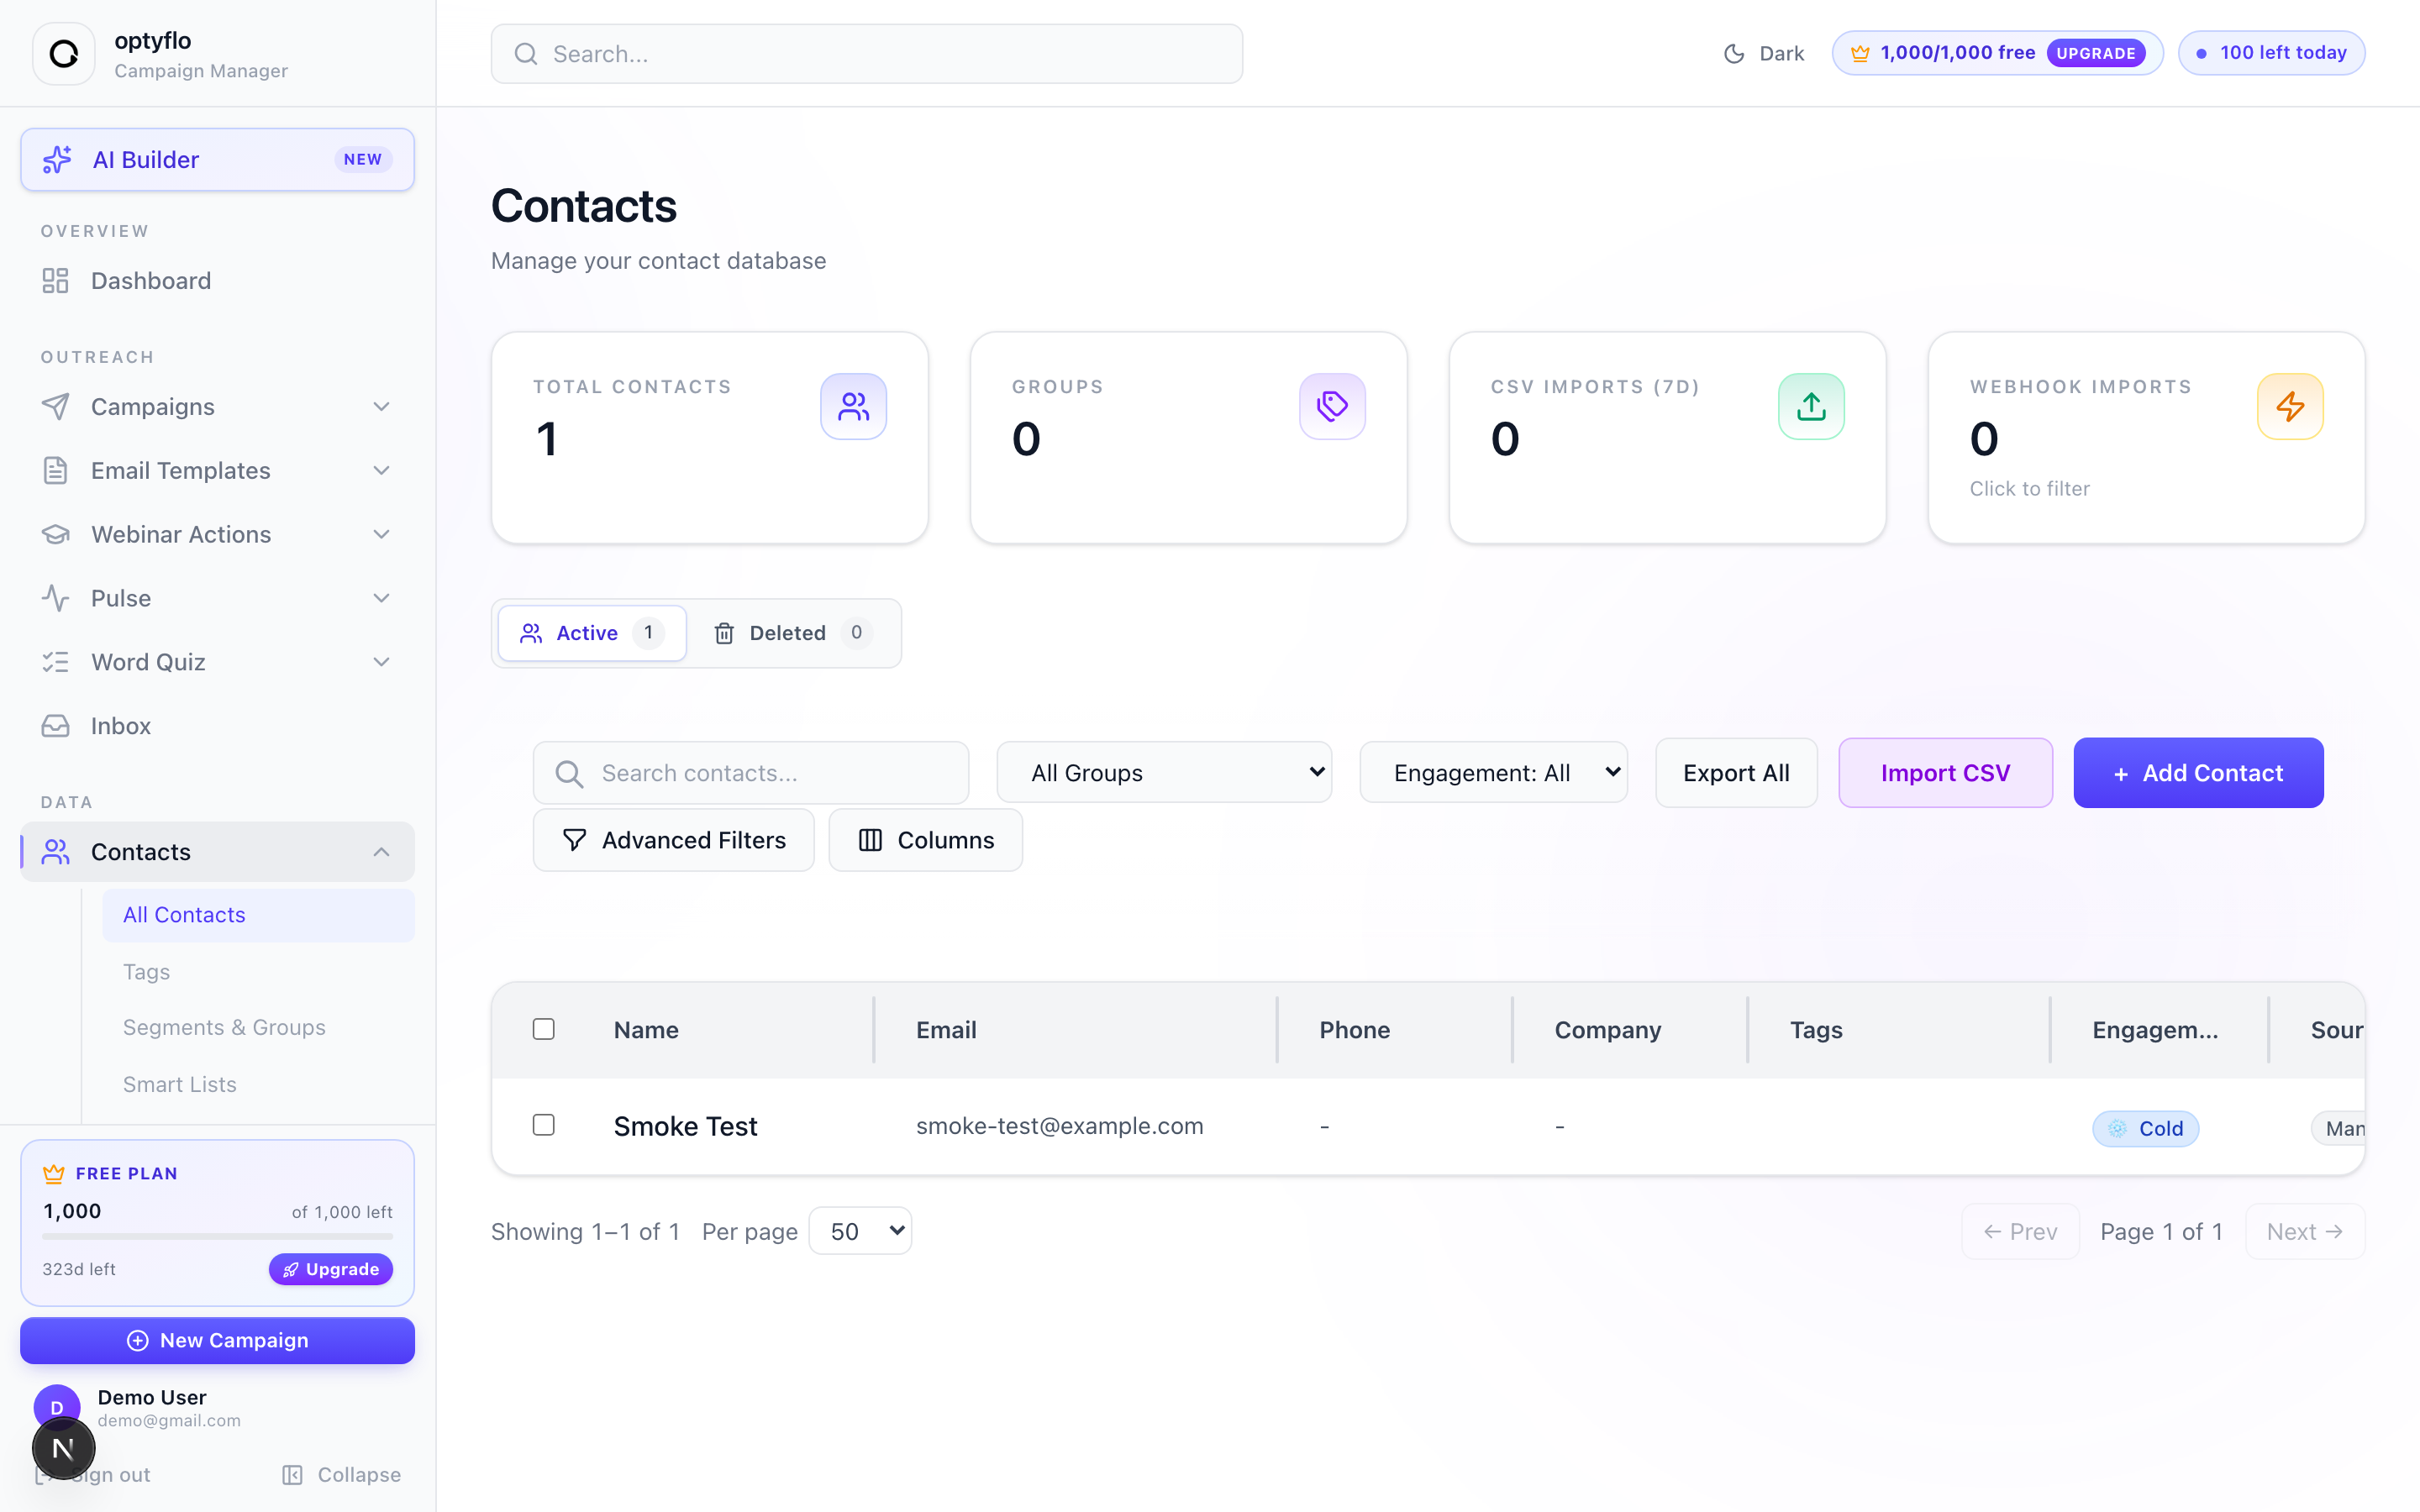 The Contacts page — stat cards up top, search and filters, then your contact table.
From this page you can also Import CSV, jump to + Add Contact, or download your list with Export All / Export Filtered.
Step 2 — Open the Add Contact form
Click + Add Contact in the top-right of the Contacts page. This opens /client/contacts/new, titled "Add New Contact" with the description "Create a new contact in your database". A ← Back to Contacts link sits at the top if you need to step away.
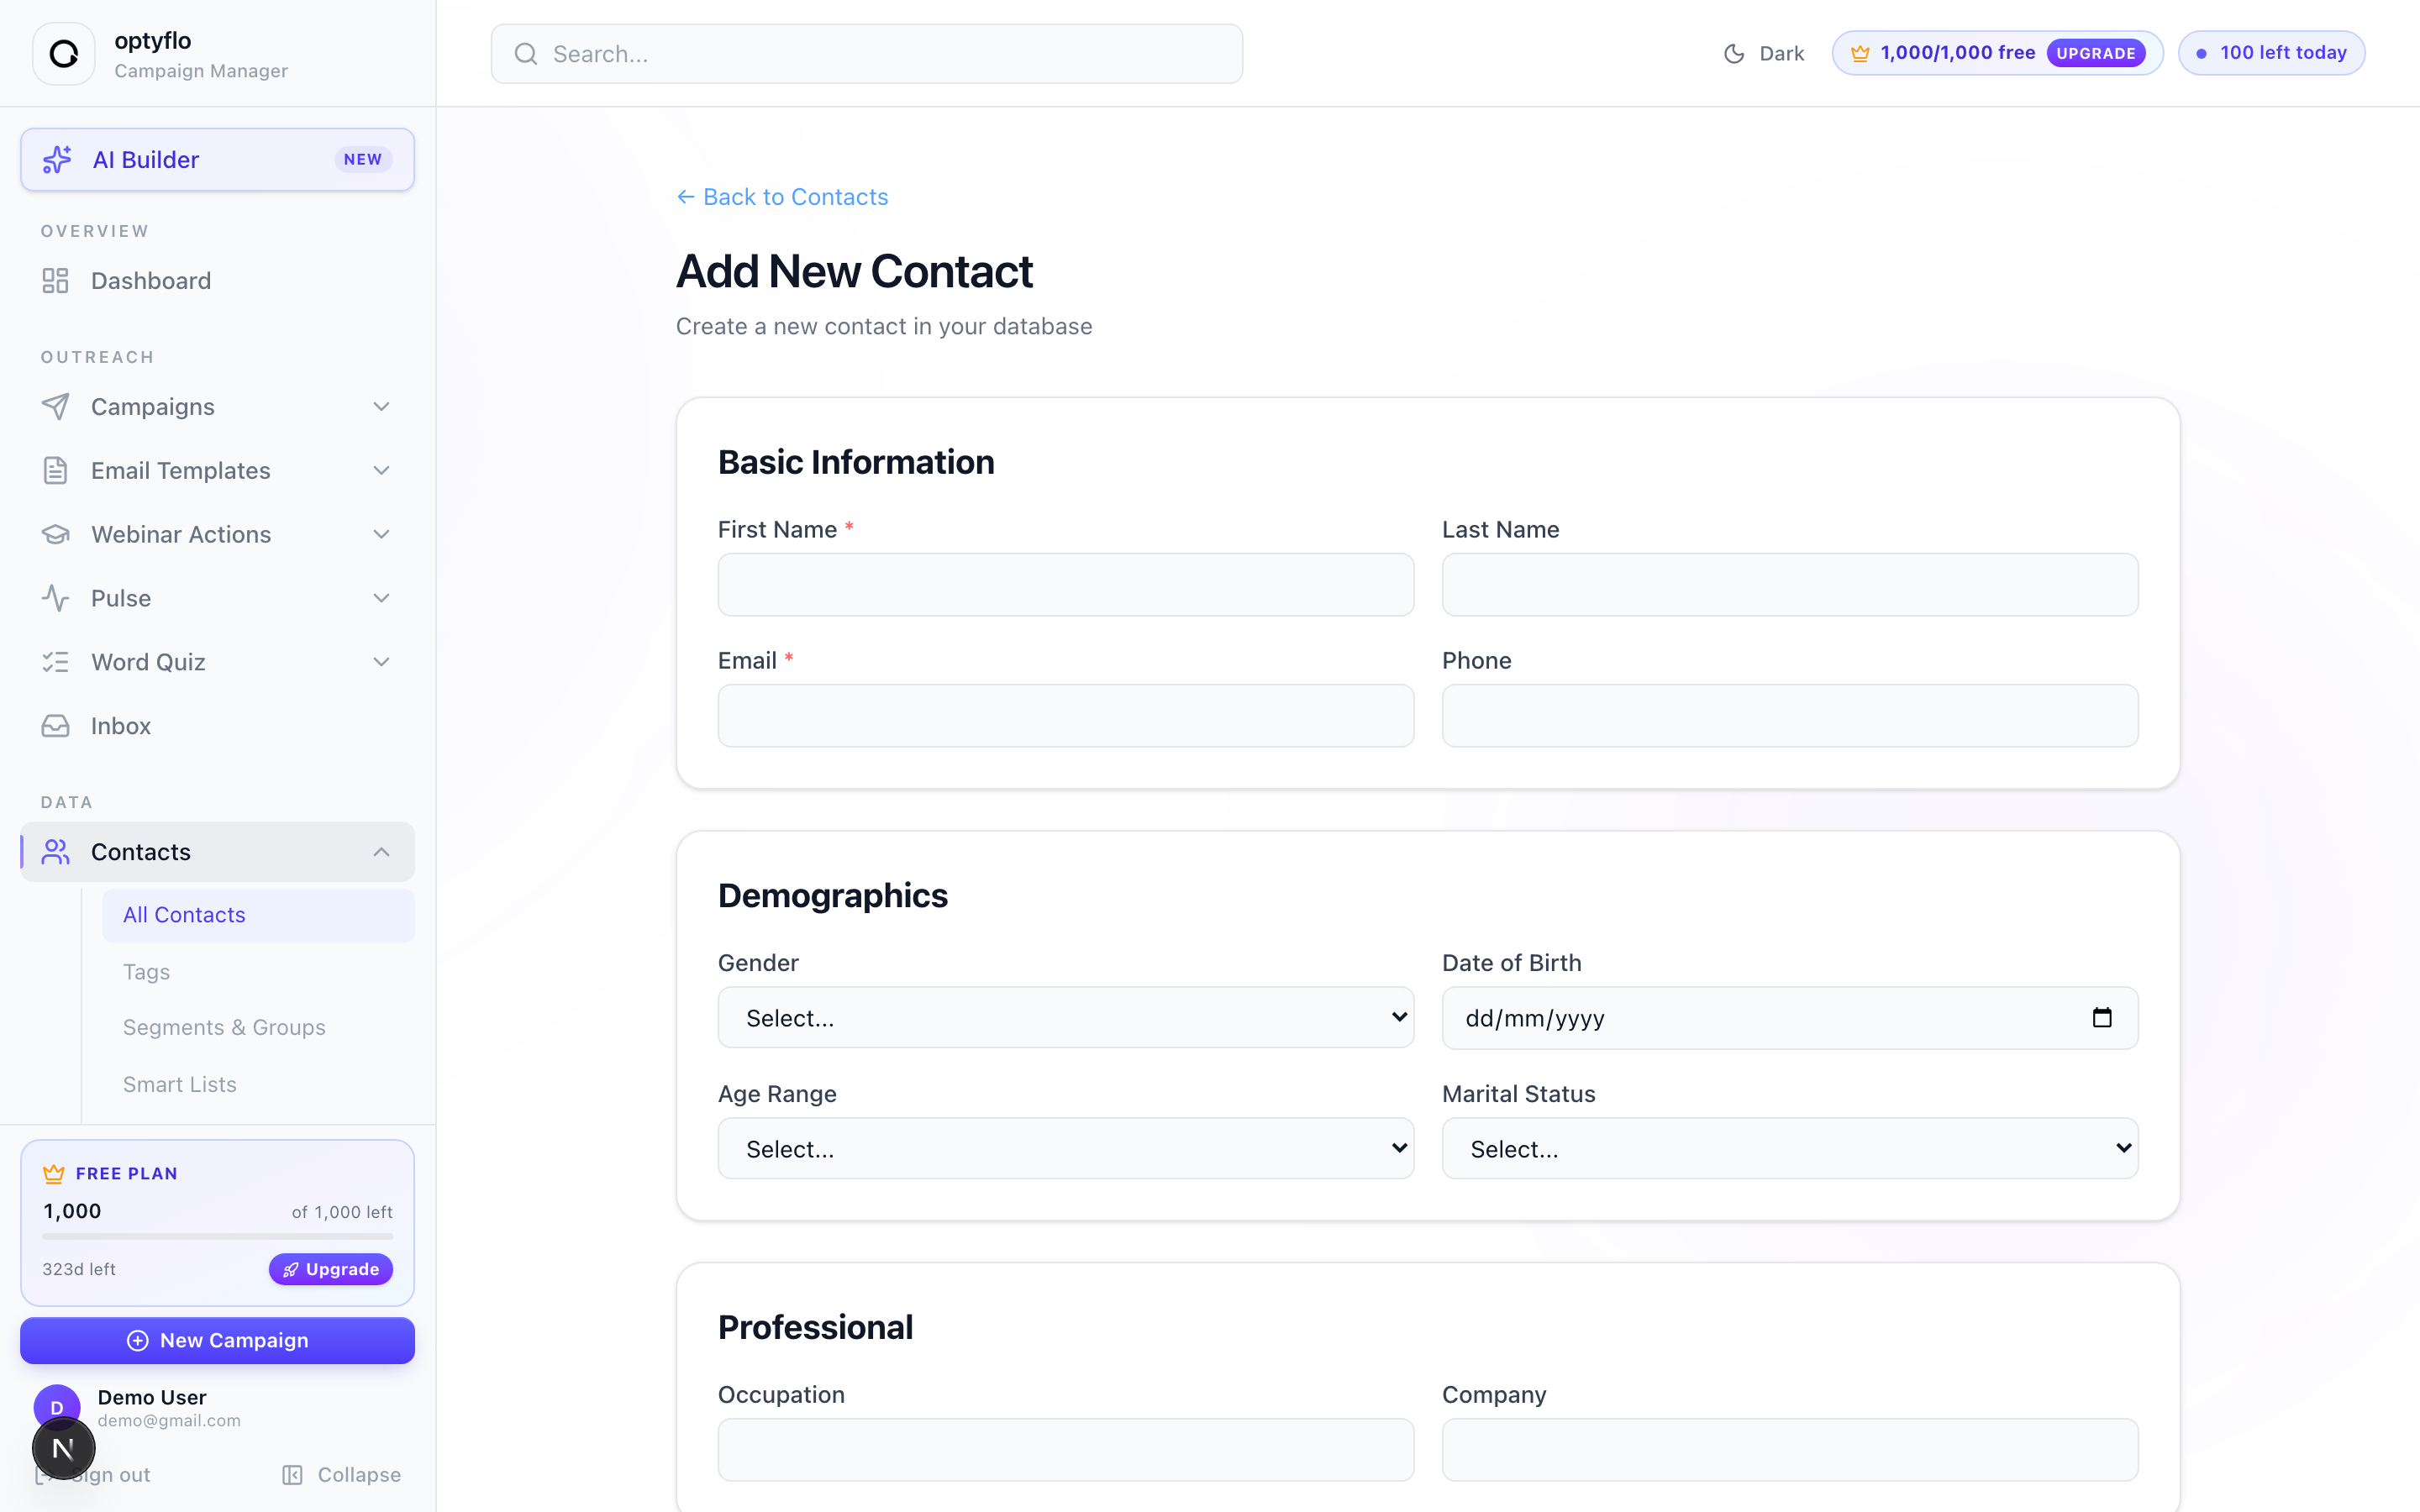 The Add New Contact form, grouped into Basic Information, Demographics, Professional, Address, and Tags & Notes.
Step 3 — Fill in the contact details
Complete the fields you have. Only First Name and Email are required (marked with *); everything else is optional and grouped into cards so you can fill in as much or as little as you like.
| Card | Fields |
|---|---|
| Basic Information | First Name *, Last Name, Email *, Phone |
| Demographics | Gender (Male / Female / Other / Prefer not to say), Date of Birth, Age Range (18-24 … 65+), Marital Status (Single / Married / Divorced / Widowed) |
| Professional | Occupation, Company |
| Address | Address Line 1, Address Line 2, City, State, Country, Postal Code |
| Tags & Notes | Tags (type in the Add tag... box), Notes |
Age Range fills itself in
If you set a Date of Birth but leave Age Range blank, optyflo works out the age range for you automatically.
Step 4 — Save the contact
Click Create Contact. The button shows "Creating..." while it saves, then takes you straight to the new contact's detail page. If something's missing you'll see an error — the two you're most likely to hit are "Email and first name are required" and, for a repeat email, "Contact with this email already exists" (edit the existing contact instead of creating a duplicate).
Tags are worth the extra few seconds
Tags aren't just labels — they're how you target campaigns and trigger automations. For example, adding a tag can fire a "Tag Added" trigger that kicks off a welcome sequence. Add a couple of meaningful tags now and they'll pay off every time you send.