

Import contacts from a CSV file
A CSV import is the fastest way to bring in an existing list — exported from another tool, a spreadsheet, or a signup form. optyflo walks you through a 4-step wizard, Upload → Mapping → Preview → Import, so you can check your data before anything is saved.
Recommended
Have your list ready as a .csv file. Only an email column is essential — but the closer your file matches optyflo's template, the less mapping you'll do by hand.
Step 1 — Upload your file
Go to /client/contacts/import. The page is titled "Import Contacts" with the description "Upload a CSV file to import your contacts", a stepper across the top (Upload → Mapping → Preview → Import), and an Import History link in the top-right.
Drag your file onto the Drop your CSV file here zone, or click Browse Files and pick a .csv.
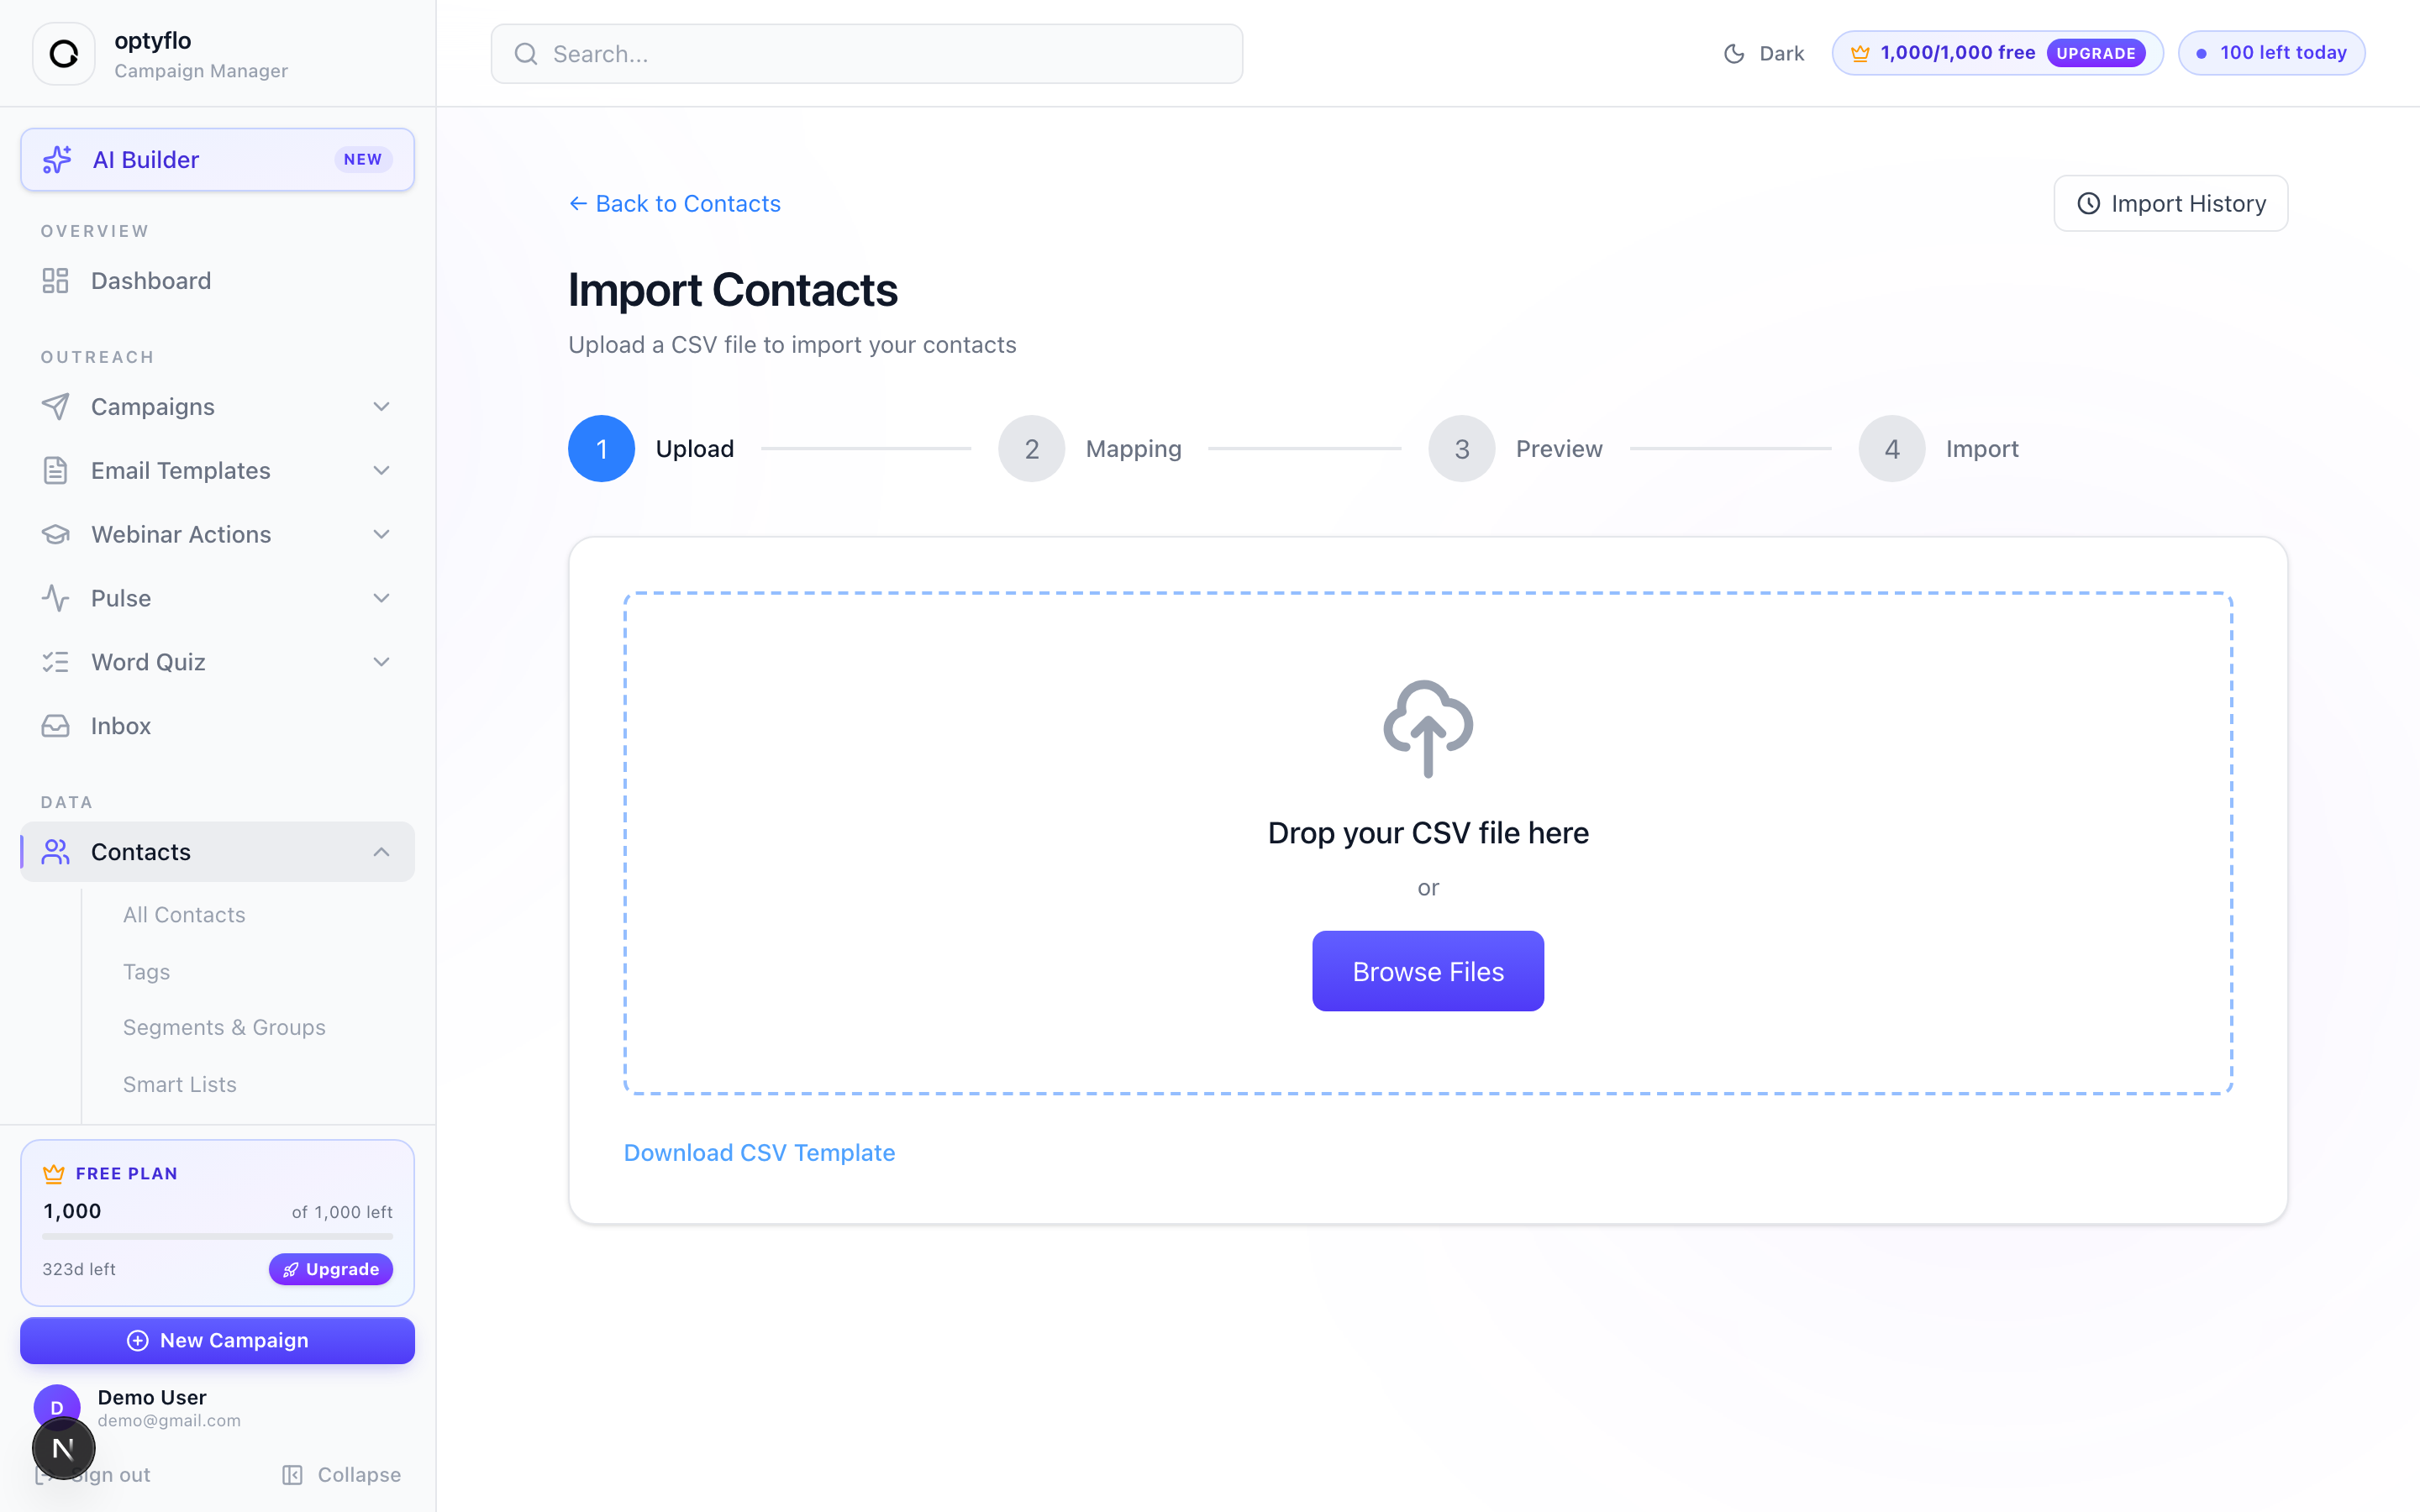 Step 1 — drop your CSV file or browse for it, and grab the template if you're building your file from scratch.
Not sure how to format it? Click Download CSV Template for a ready-made file whose header row is exactly:
firstName, lastName, email, phone, gender, dateOfBirth, ageRange,
maritalStatus, occupation, company, addressLine1, addressLine2,
city, state, country, postalCode, tags, notes
Only email is essential
Every other column is optional. The tags column accepts multiple tags separated by commas or semicolons — for example customer;vip.
Step 2 — Map your columns
Match each CSV column to a contact field. Under the heading "Map CSV Columns" / "Match your CSV columns to contact fields", optyflo auto-matches your headers — each row shows "CSV Column: {name}" with a dropdown of target fields on the right. Review them and adjust anything that landed wrong.
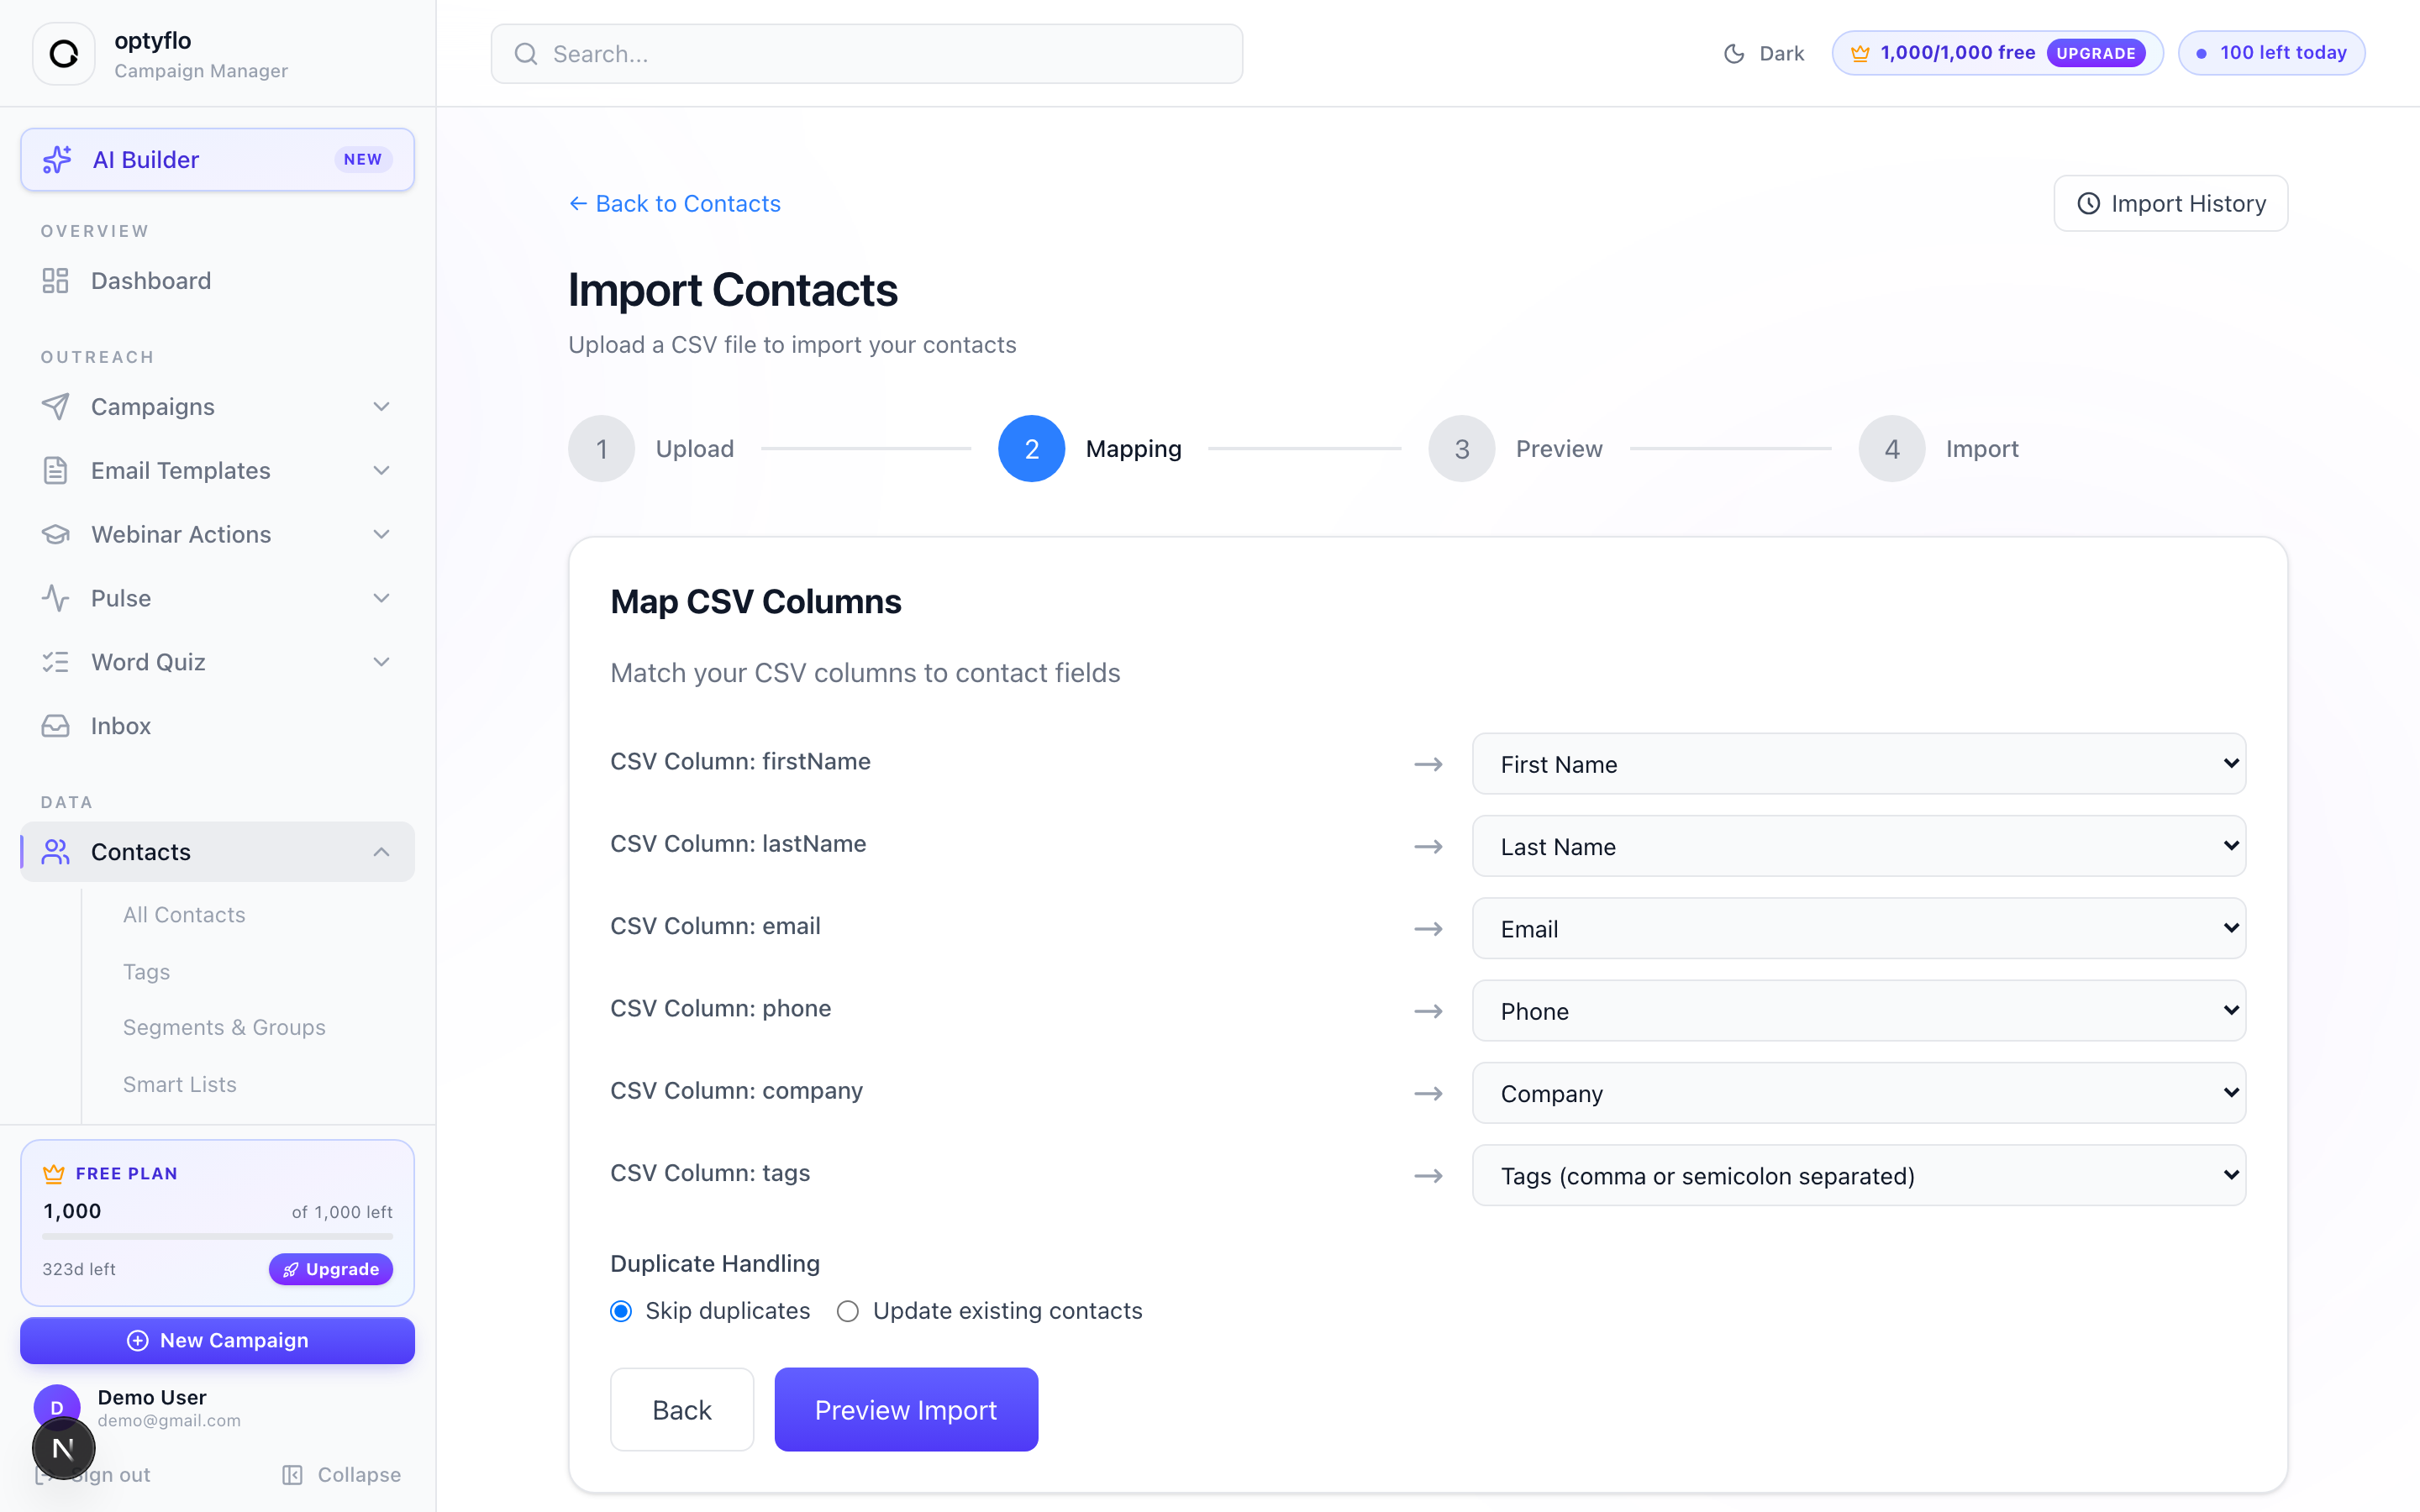 Step 2 — each CSV column maps to a contact field. Set how duplicates are handled, then continue.
Useful dropdown options include:
| Option | Use it when |
|---|---|
| Skip this column | The column isn't something you want to import |
| Full Name (auto-split) | Your file has one combined name column |
| First Name, Email, … | Standard one-to-one field matches |
| Tags (comma or semicolon separated) | Your file lists multiple tags in one cell |
| Notes | Free-form note text |
Then set Duplicate Handling — how rows whose email already exists are treated:
- Skip duplicates (default) — existing contacts are left untouched; only new email addresses are added.
- Update existing contacts — intended to refresh matched contacts with the new values.
Duplicates are matched by email
optyflo de-duplicates by email address. In the current version, rows that match an existing contact are skipped rather than overwritten — so an import mainly adds new people, and the Updated count may stay at 0. Re-running the same file is safe.
When everything looks right, click Preview Import.
Step 3 — Preview before importing
Check the sample rows. The "Preview" step confirms "Ready to import {N} contact(s)" and shows the first mapped rows ("Showing first 5 of {N} contacts") so you can spot a mis-mapped column before committing. If it all looks correct, click Start Import. To fix anything, click Back.
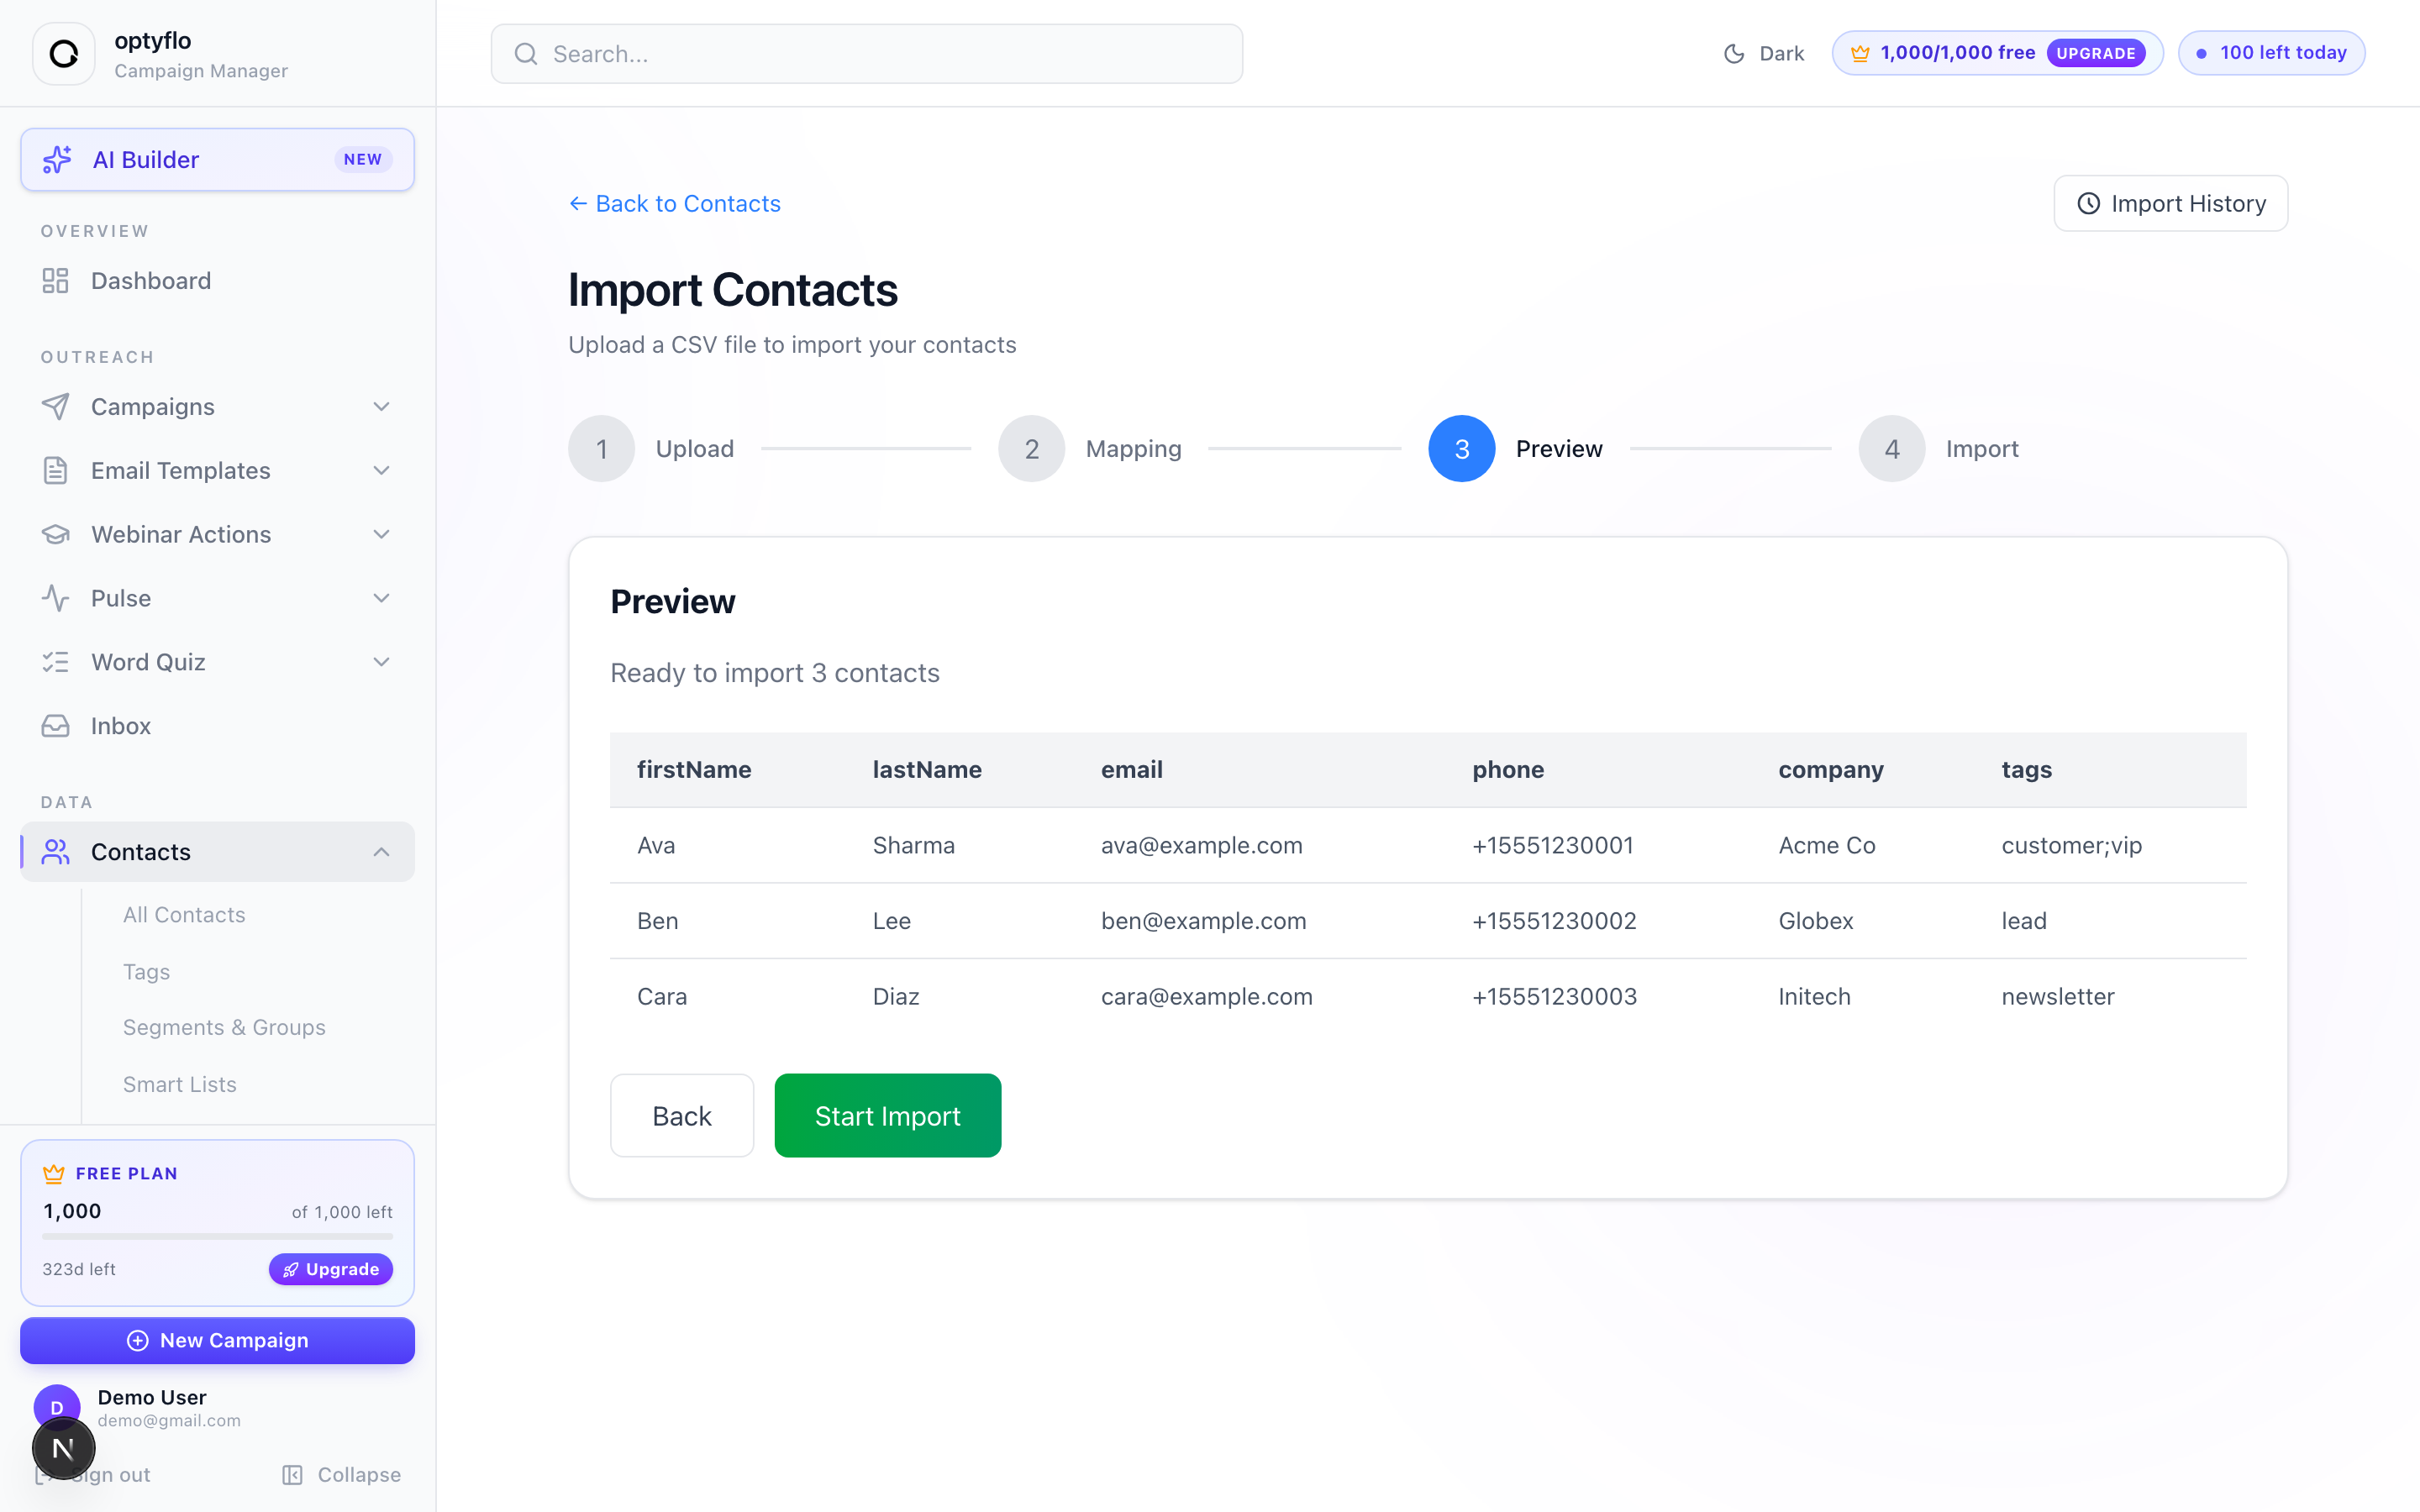 Step 3 — a preview of the first 5 mapped rows, so you can catch mistakes before importing.
Step 4 — Import and review the results
Click Start Import and let it run. optyflo shows "Importing contacts..." with a "Processing {x} of {y}" counter. Large imports keep running in the background — you can leave this page and check Import History later without losing progress.
When it finishes you'll see "Import Complete!" with three counts:
| Count | Meaning |
|---|---|
| Created | Brand-new contacts added |
| Updated | Existing contacts changed (see the note on duplicate handling above) |
| Skipped | Rows that were duplicates or invalid — expand View skip reasons for details |
From here, the footer links let you jump to View Contacts or Import History.
Changed your mind? You can undo
Every import is reversible for 30 days. Go to Import History (/client/contacts/imports), find the import, and use the Rollback action to remove exactly the contacts it added or changed.
Next: stream contacts in automatically → Import contacts via webhook